DIY Home Golf Simulator Screen - For Cheap
Mark Friesen • February 16, 2020
UPDATE MARCH 2020
- Update has been added to the end.
DIY Golf Simulator Enclosure
I’m not one for a bunch of introductory paragraphs to waste people’s time who are looking for information to solve a problem… so let’s just get into it.
My Problem: I wanted a compact golf simulator hitting area in my garage with a SkyTrak... and I’m cheap.
The first thing I needed was obviously a Skytrak, so I waited until they went on sale for $1,695.00 ($300 off normal price). This happens about 2-3 times a year, and around Christmas is one of those times you can count on.
The setup I had before the SkyTrak;
Pro Series hitting net from The Net Return Company
Pro Turf from The Net Return company
Both are very good products. Problem… you can only hit into a net for so long. I did my research, plenty of research, and here is what I did.
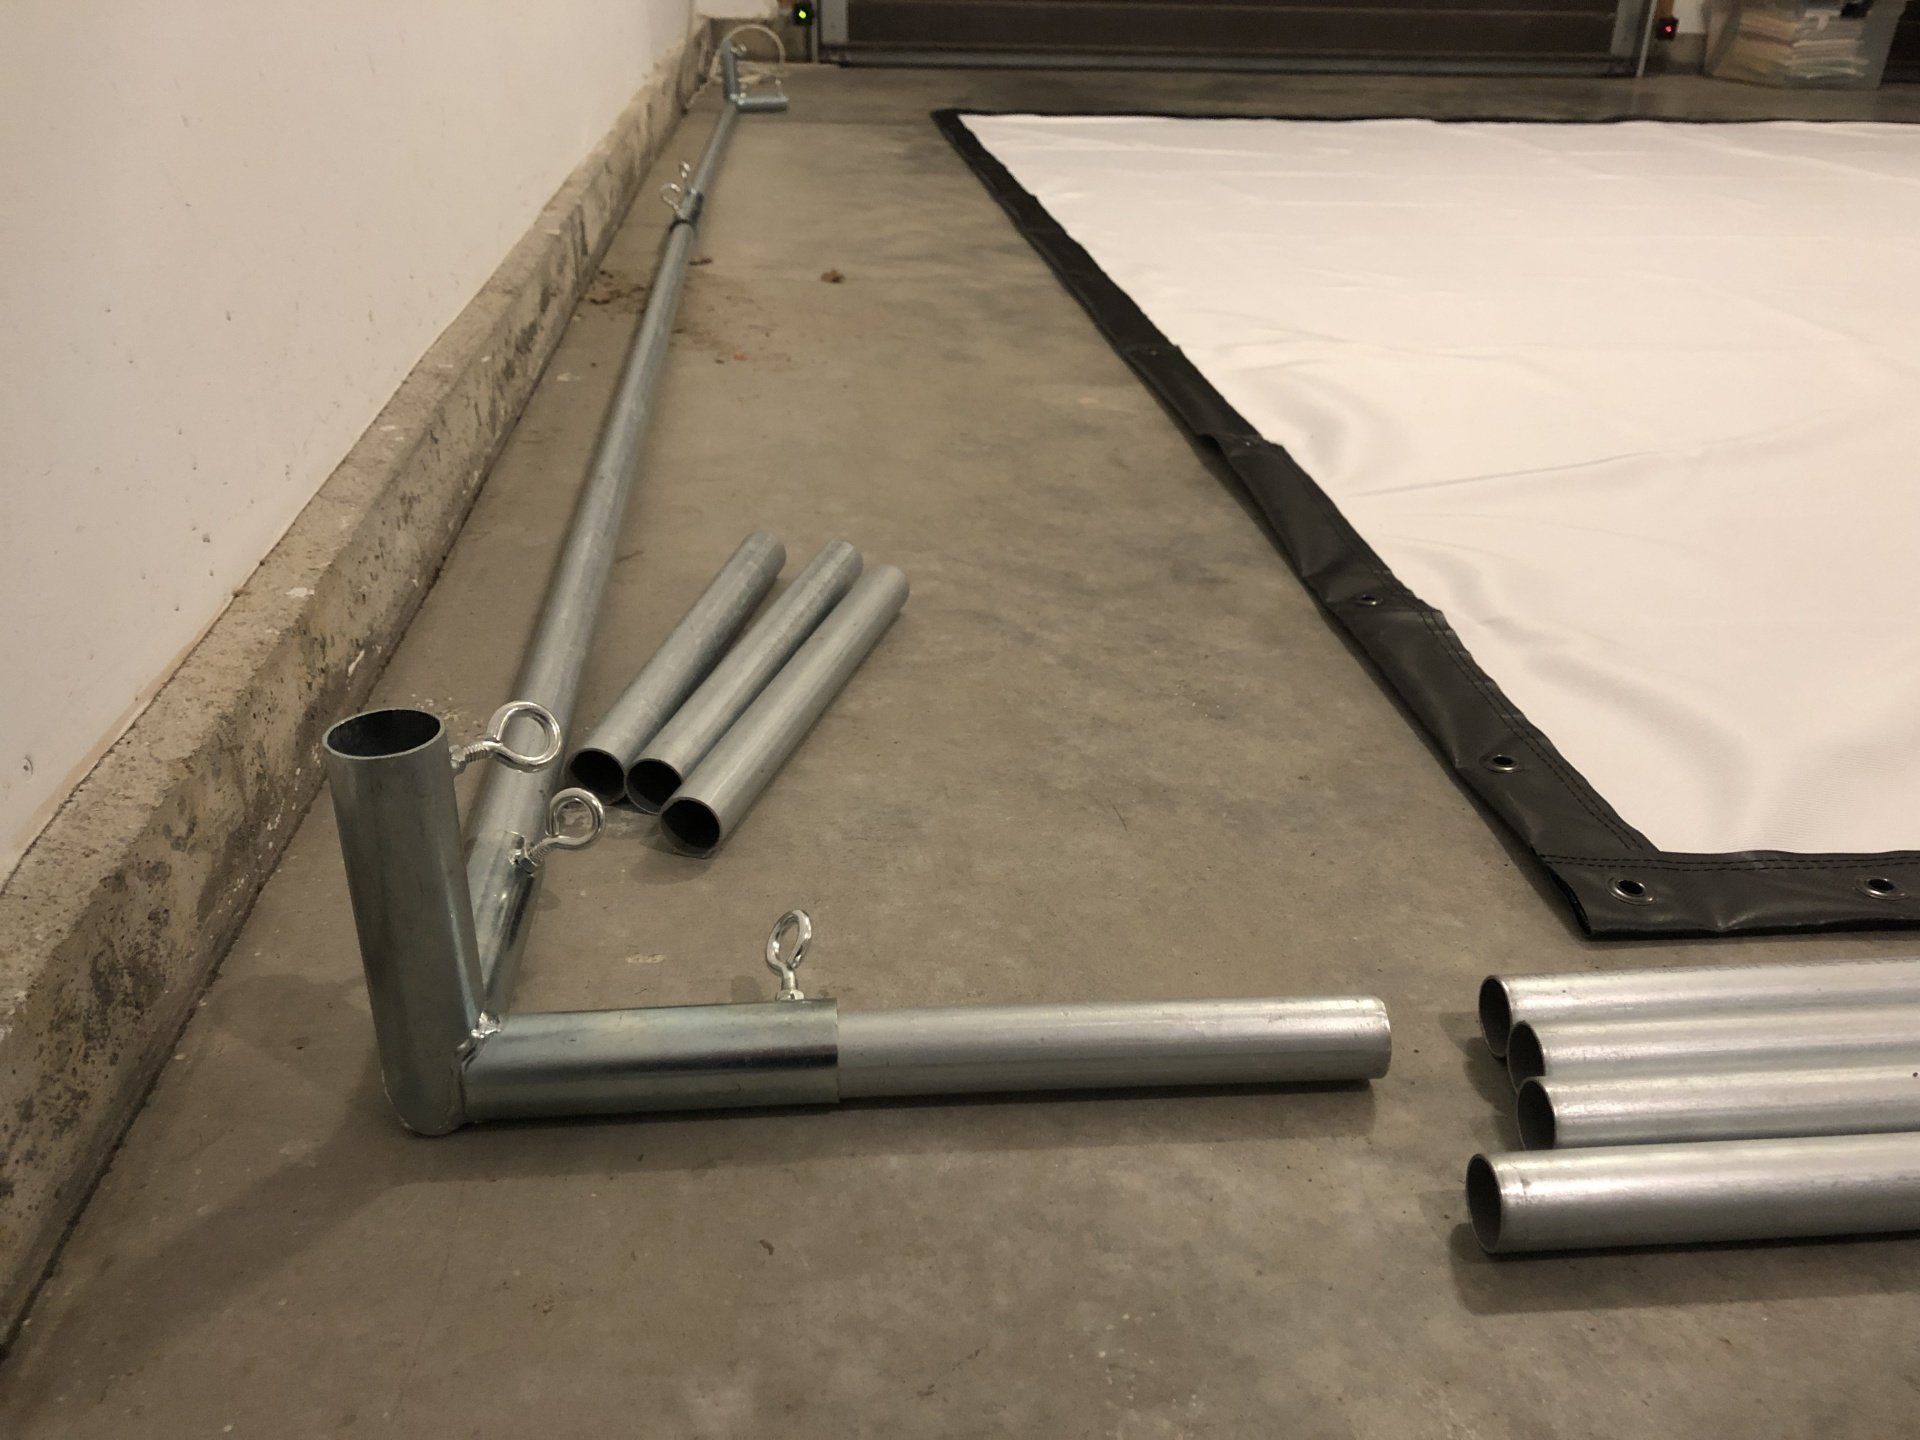
First consideration: DIY Golf Simulator Enclosure Kit from Carl’s Place
As I mentioned before, I’m cheap and couldn’t pony up the $800 some bucks for an 8” x 10.5” DIY kit. So I made my own with the following pieces.
List of Services
-
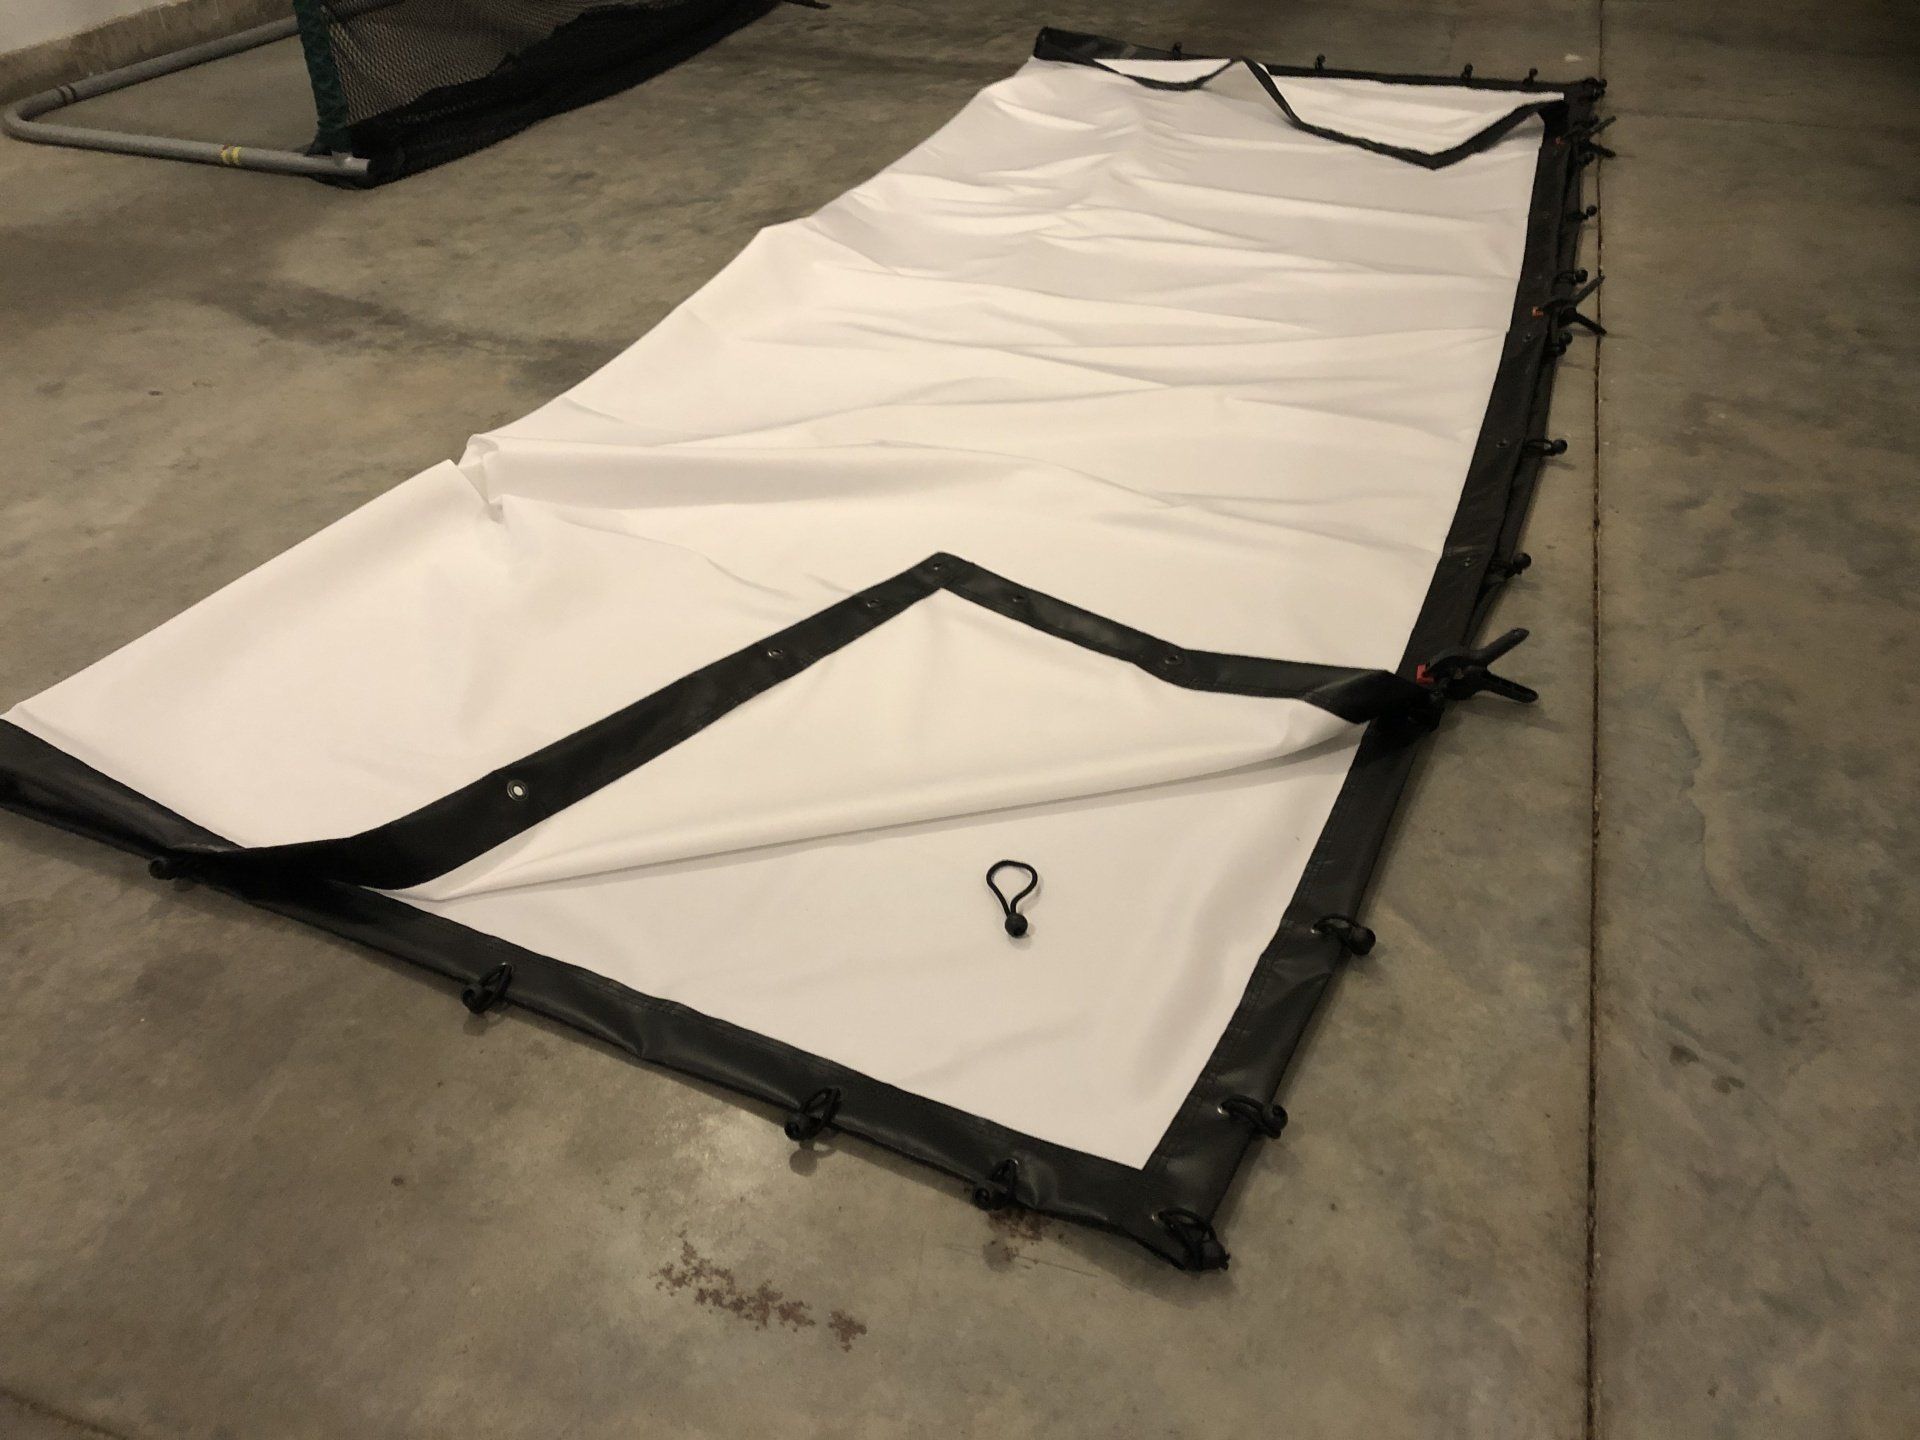
Carl's Place (4:3) Preferred Golf Impact ScreenList Item 1
Carl's Place (4:3)
164" Diag- 8.5 x 11.5 Ft
Preferred Golf Impact Screen
Amazon - $394.95
-
Pro TurfList Item 2
Net Return Store (I already owned this)
6ft x 10ft
$449
-
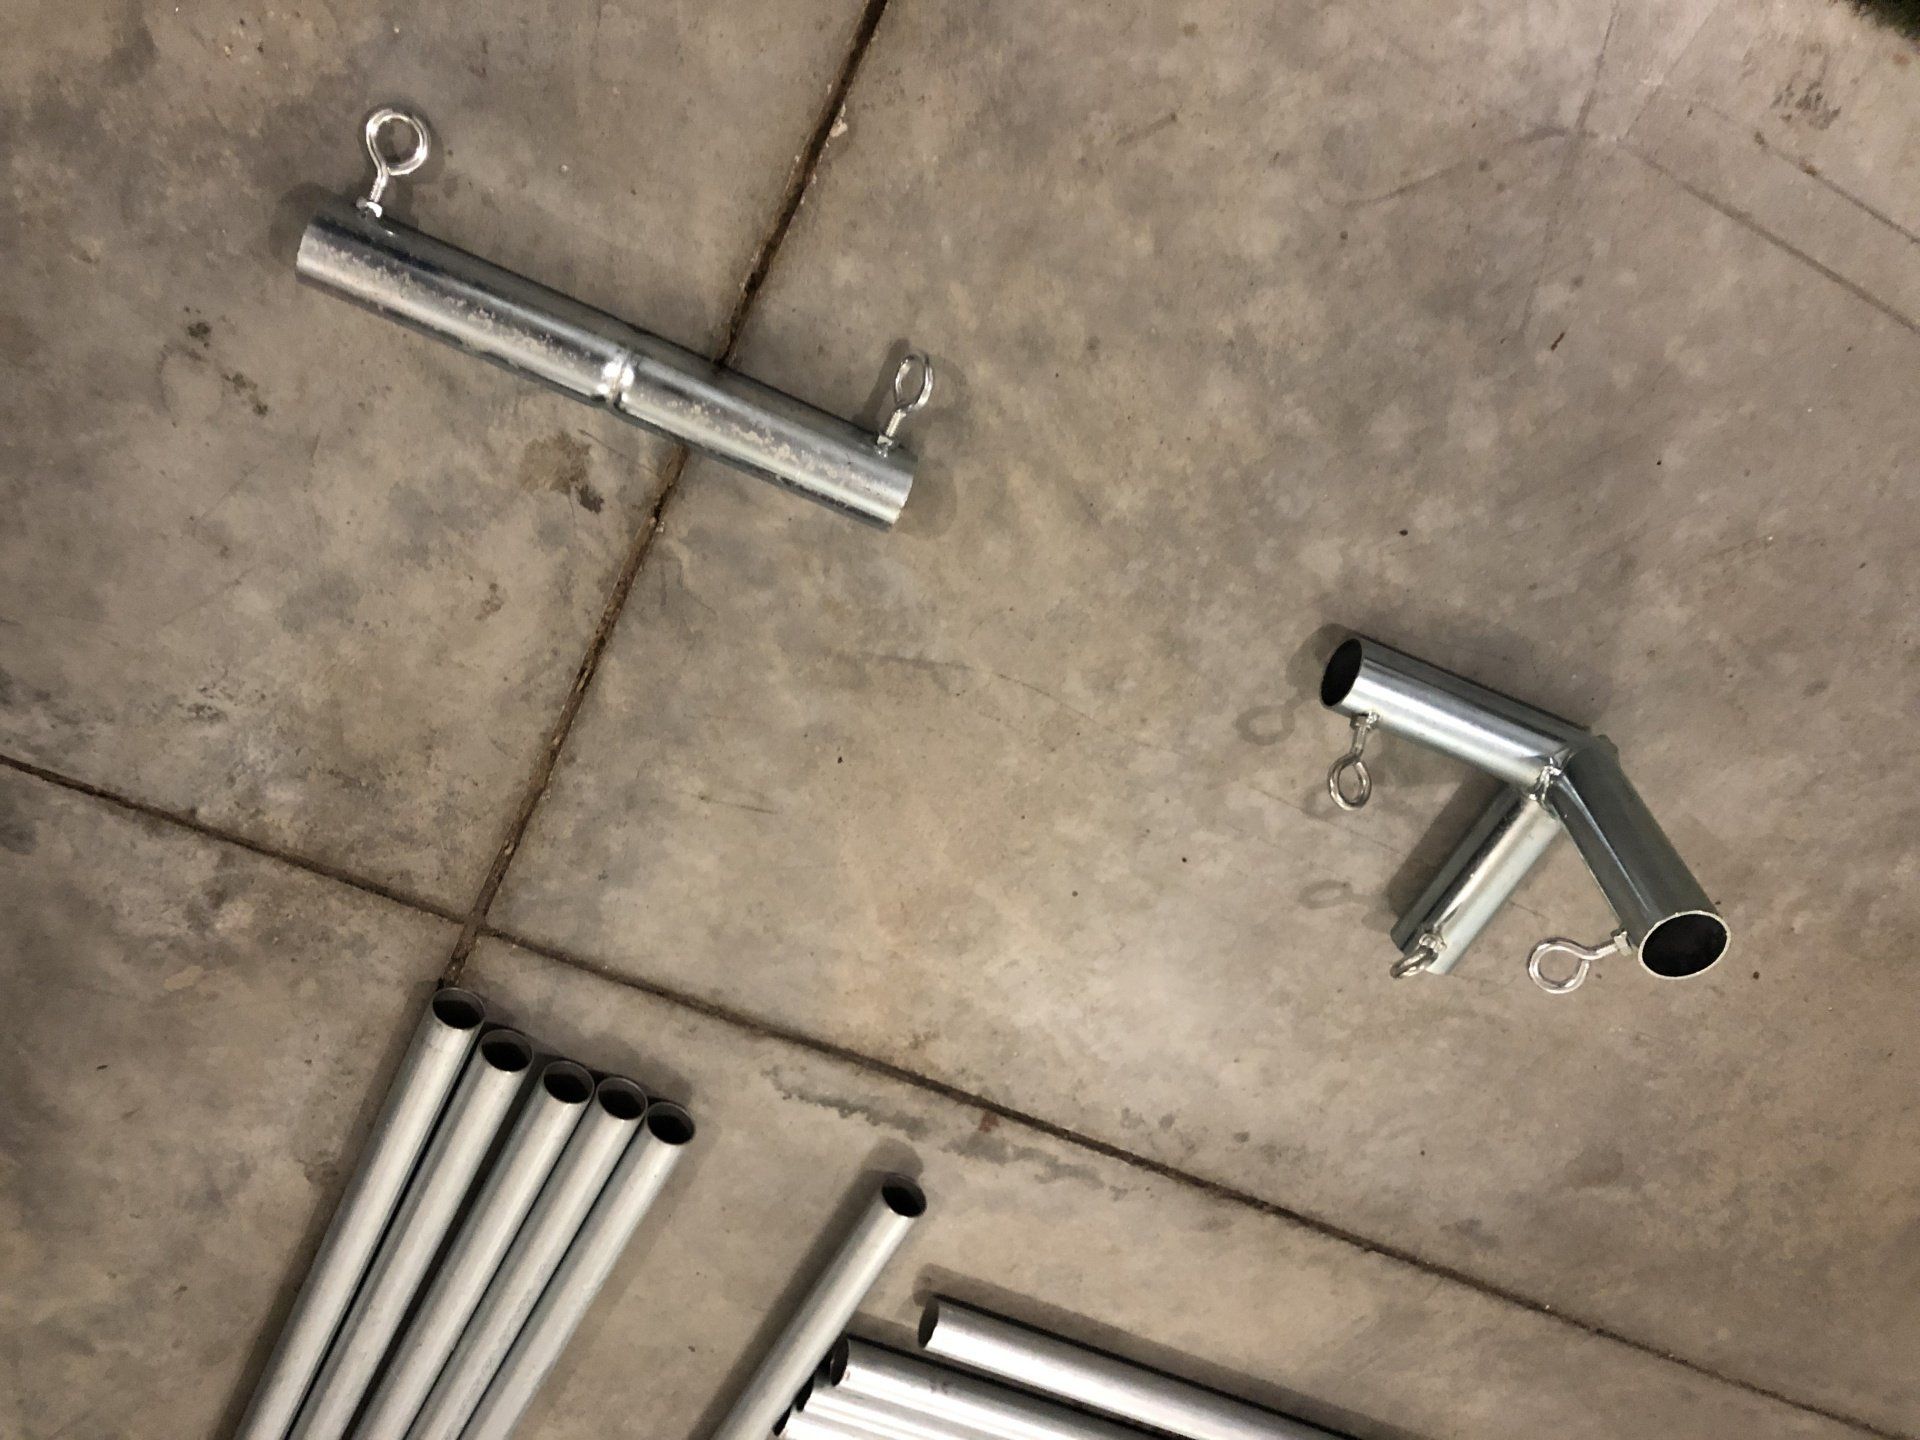
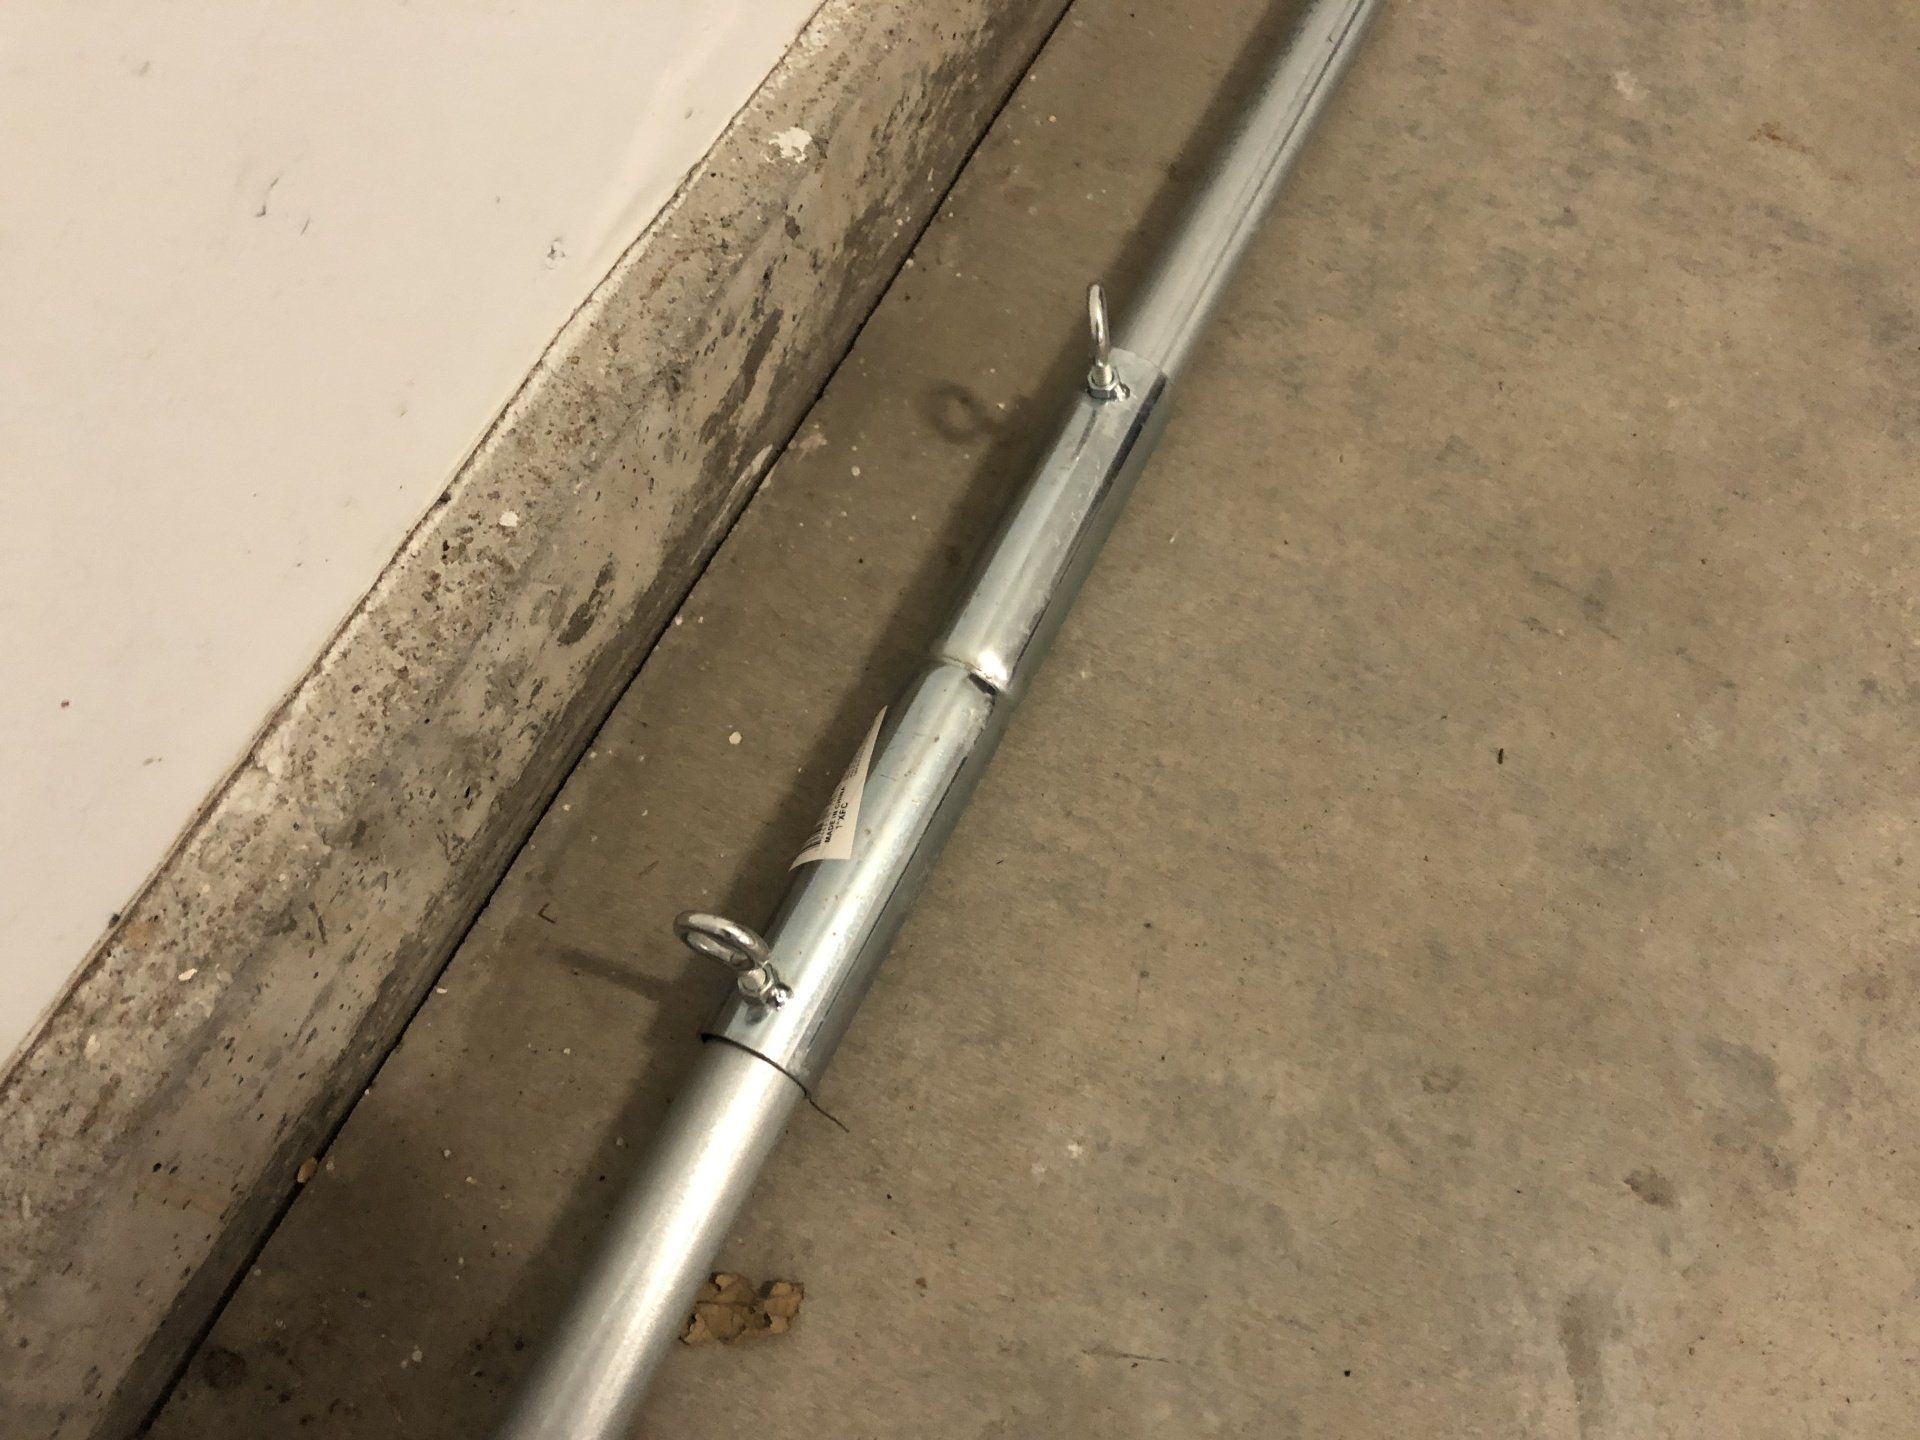
Flat Corner Canopy FittingsList Item 3
8pc 3-way
1 inch diam.
Amazon - $65.89
-
Canopy Fitting ConnectorsList Item 4
4pc 2-way Connectors
1 inch diam.
Amazon - $27.89
-
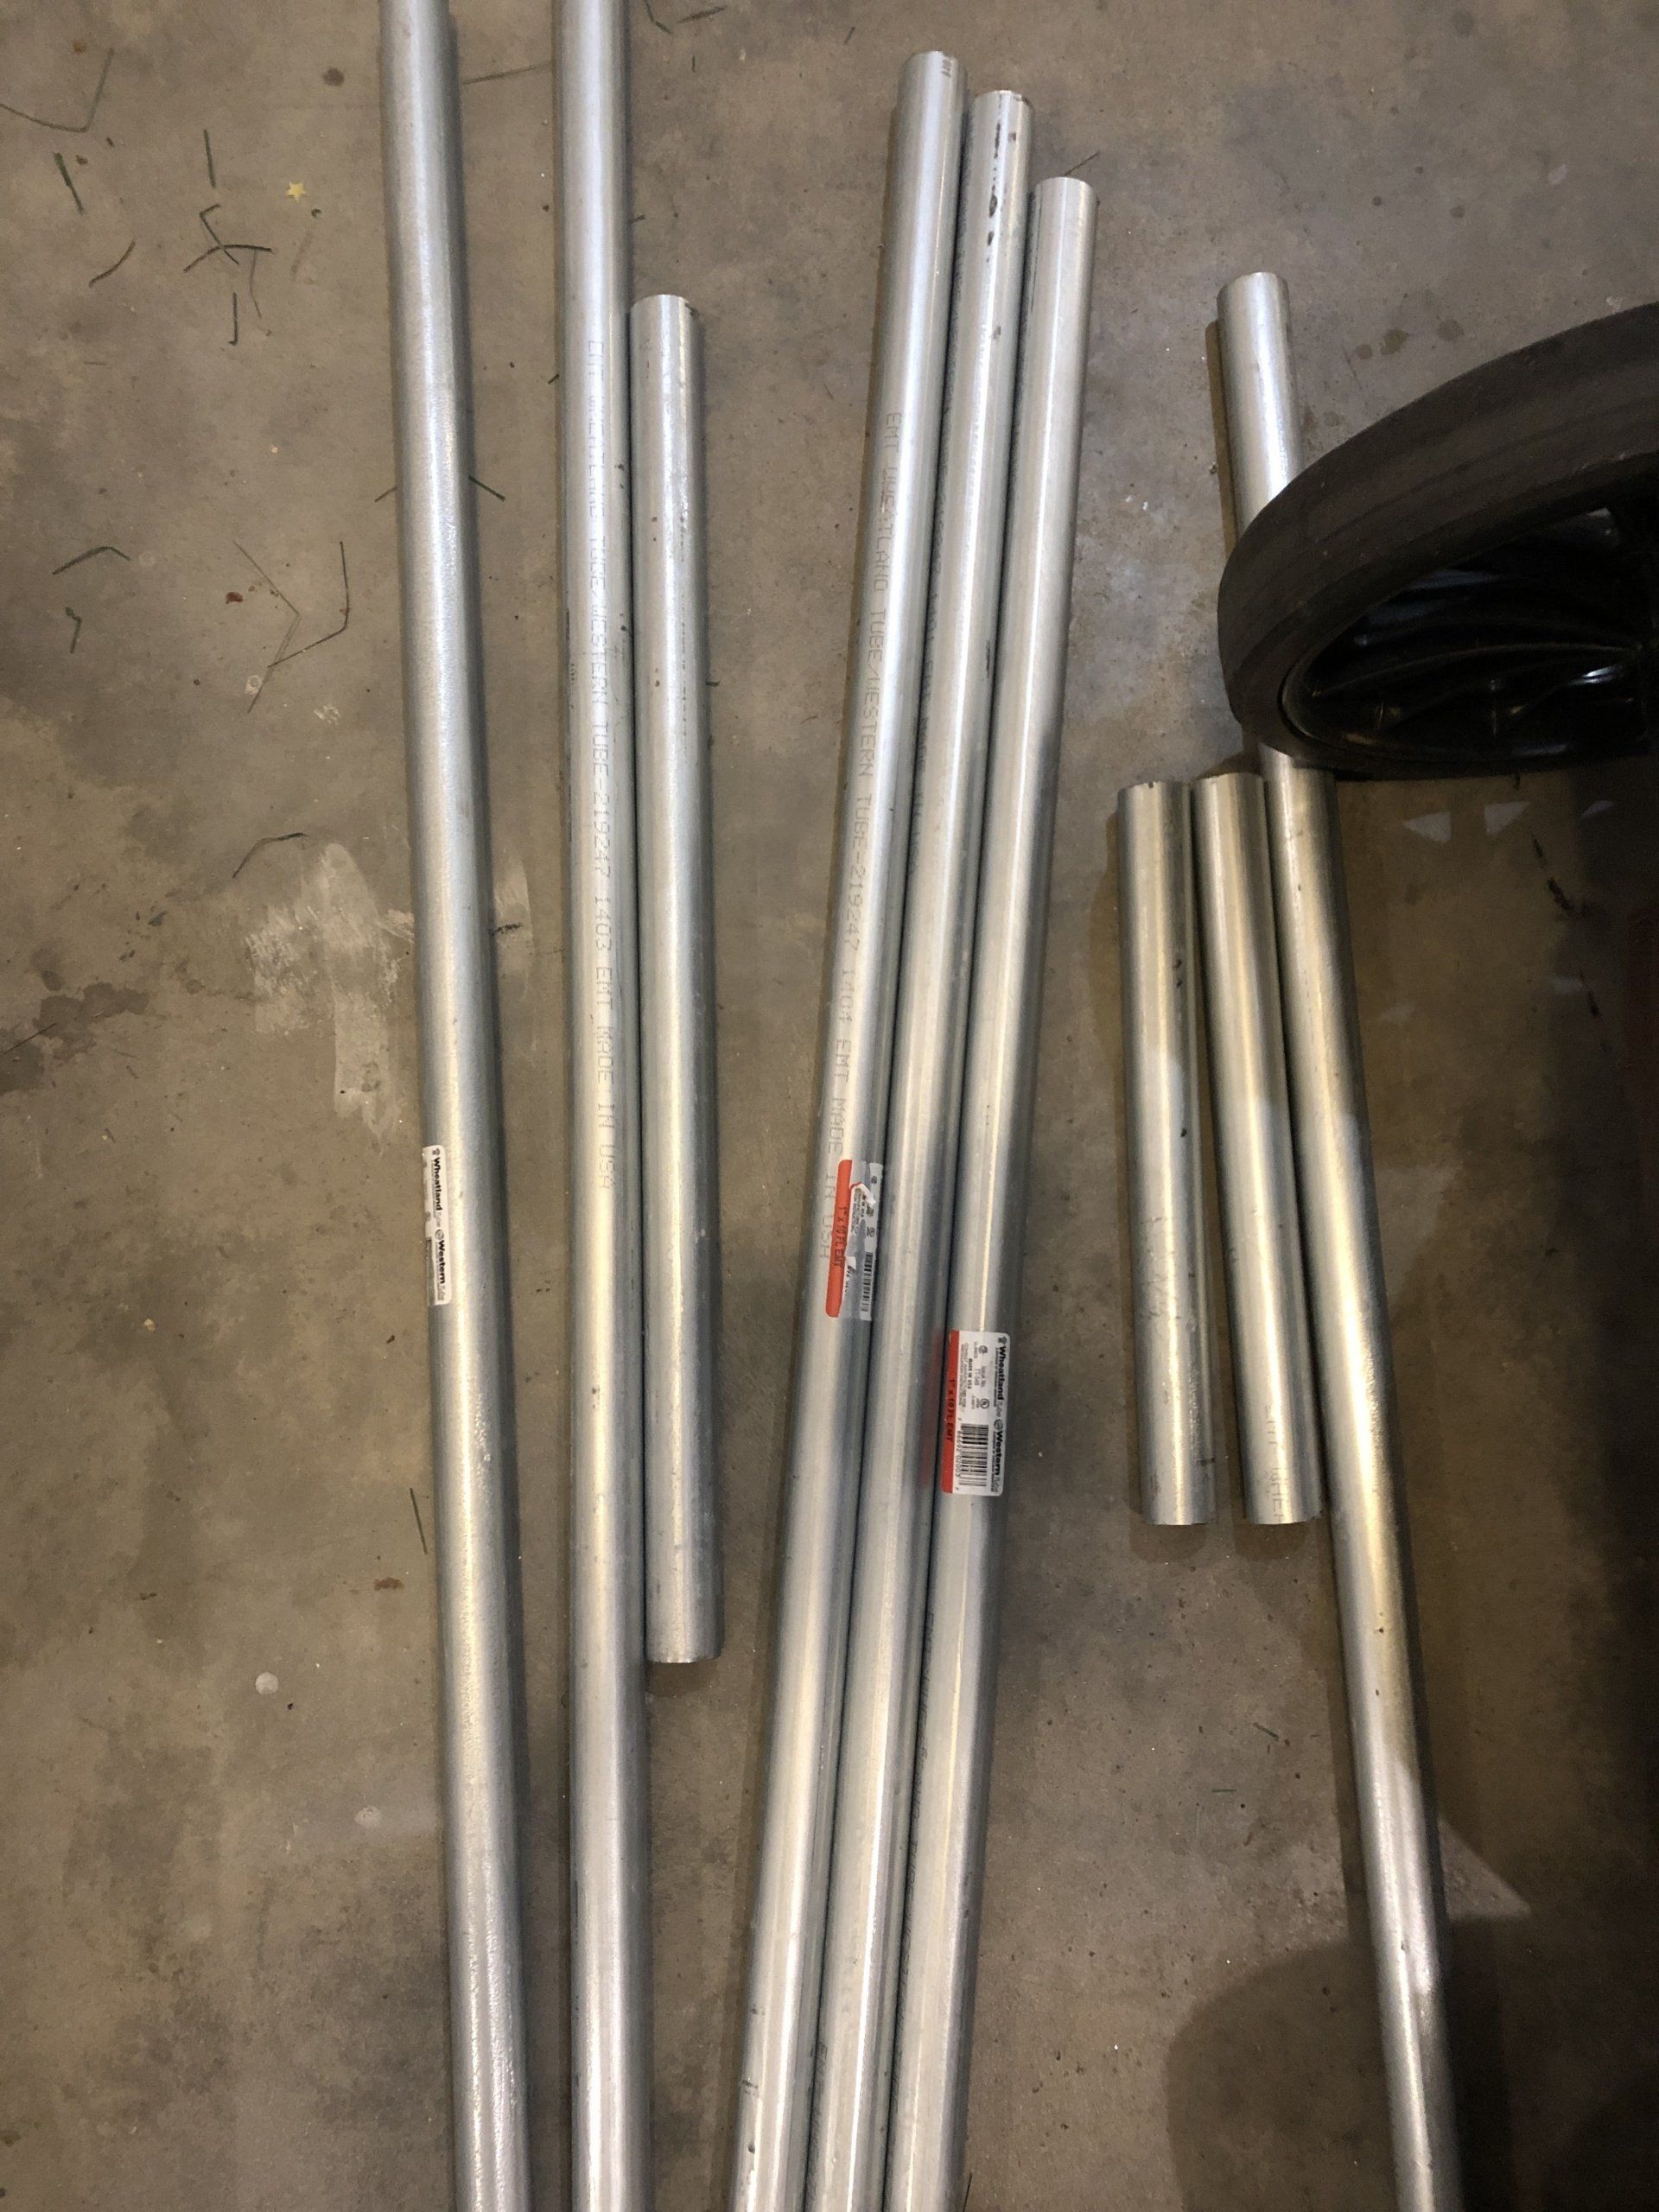
EMT Conduit
1 inch diam.
10ft length
12-14 pieces ($9.80/piece)
Purchased at Menards (Lowe's & Home Depot have them too)
About $150
-
Joneaz Ball Bungees
4 inch
.08 inch ball
50 pieces
Amazon - $14.99
-
Optoma Short Throw Projector
GT1080Darbee
3000 Lumens
Amazon - $584.72
-
Ceiling Projector Mount
DYNAVISTA Full Motion Universal Ceiling Projector Mount Bracket
Amazon - $34.99
-
High Impact Netting
Dynamax Sports High Impact Golf Barrier Net
10ft x 10ft
Amazon - $45.00
-
Commercial Fishing Net
4ft x 12ft
Amazon - $17.00
Grand Total = 3,479.43
(includes SkyTrak, taxes not included)
DIY SIM
Enclosure = $715.72 (only includes pieces to make the enclosure, taxes not included)
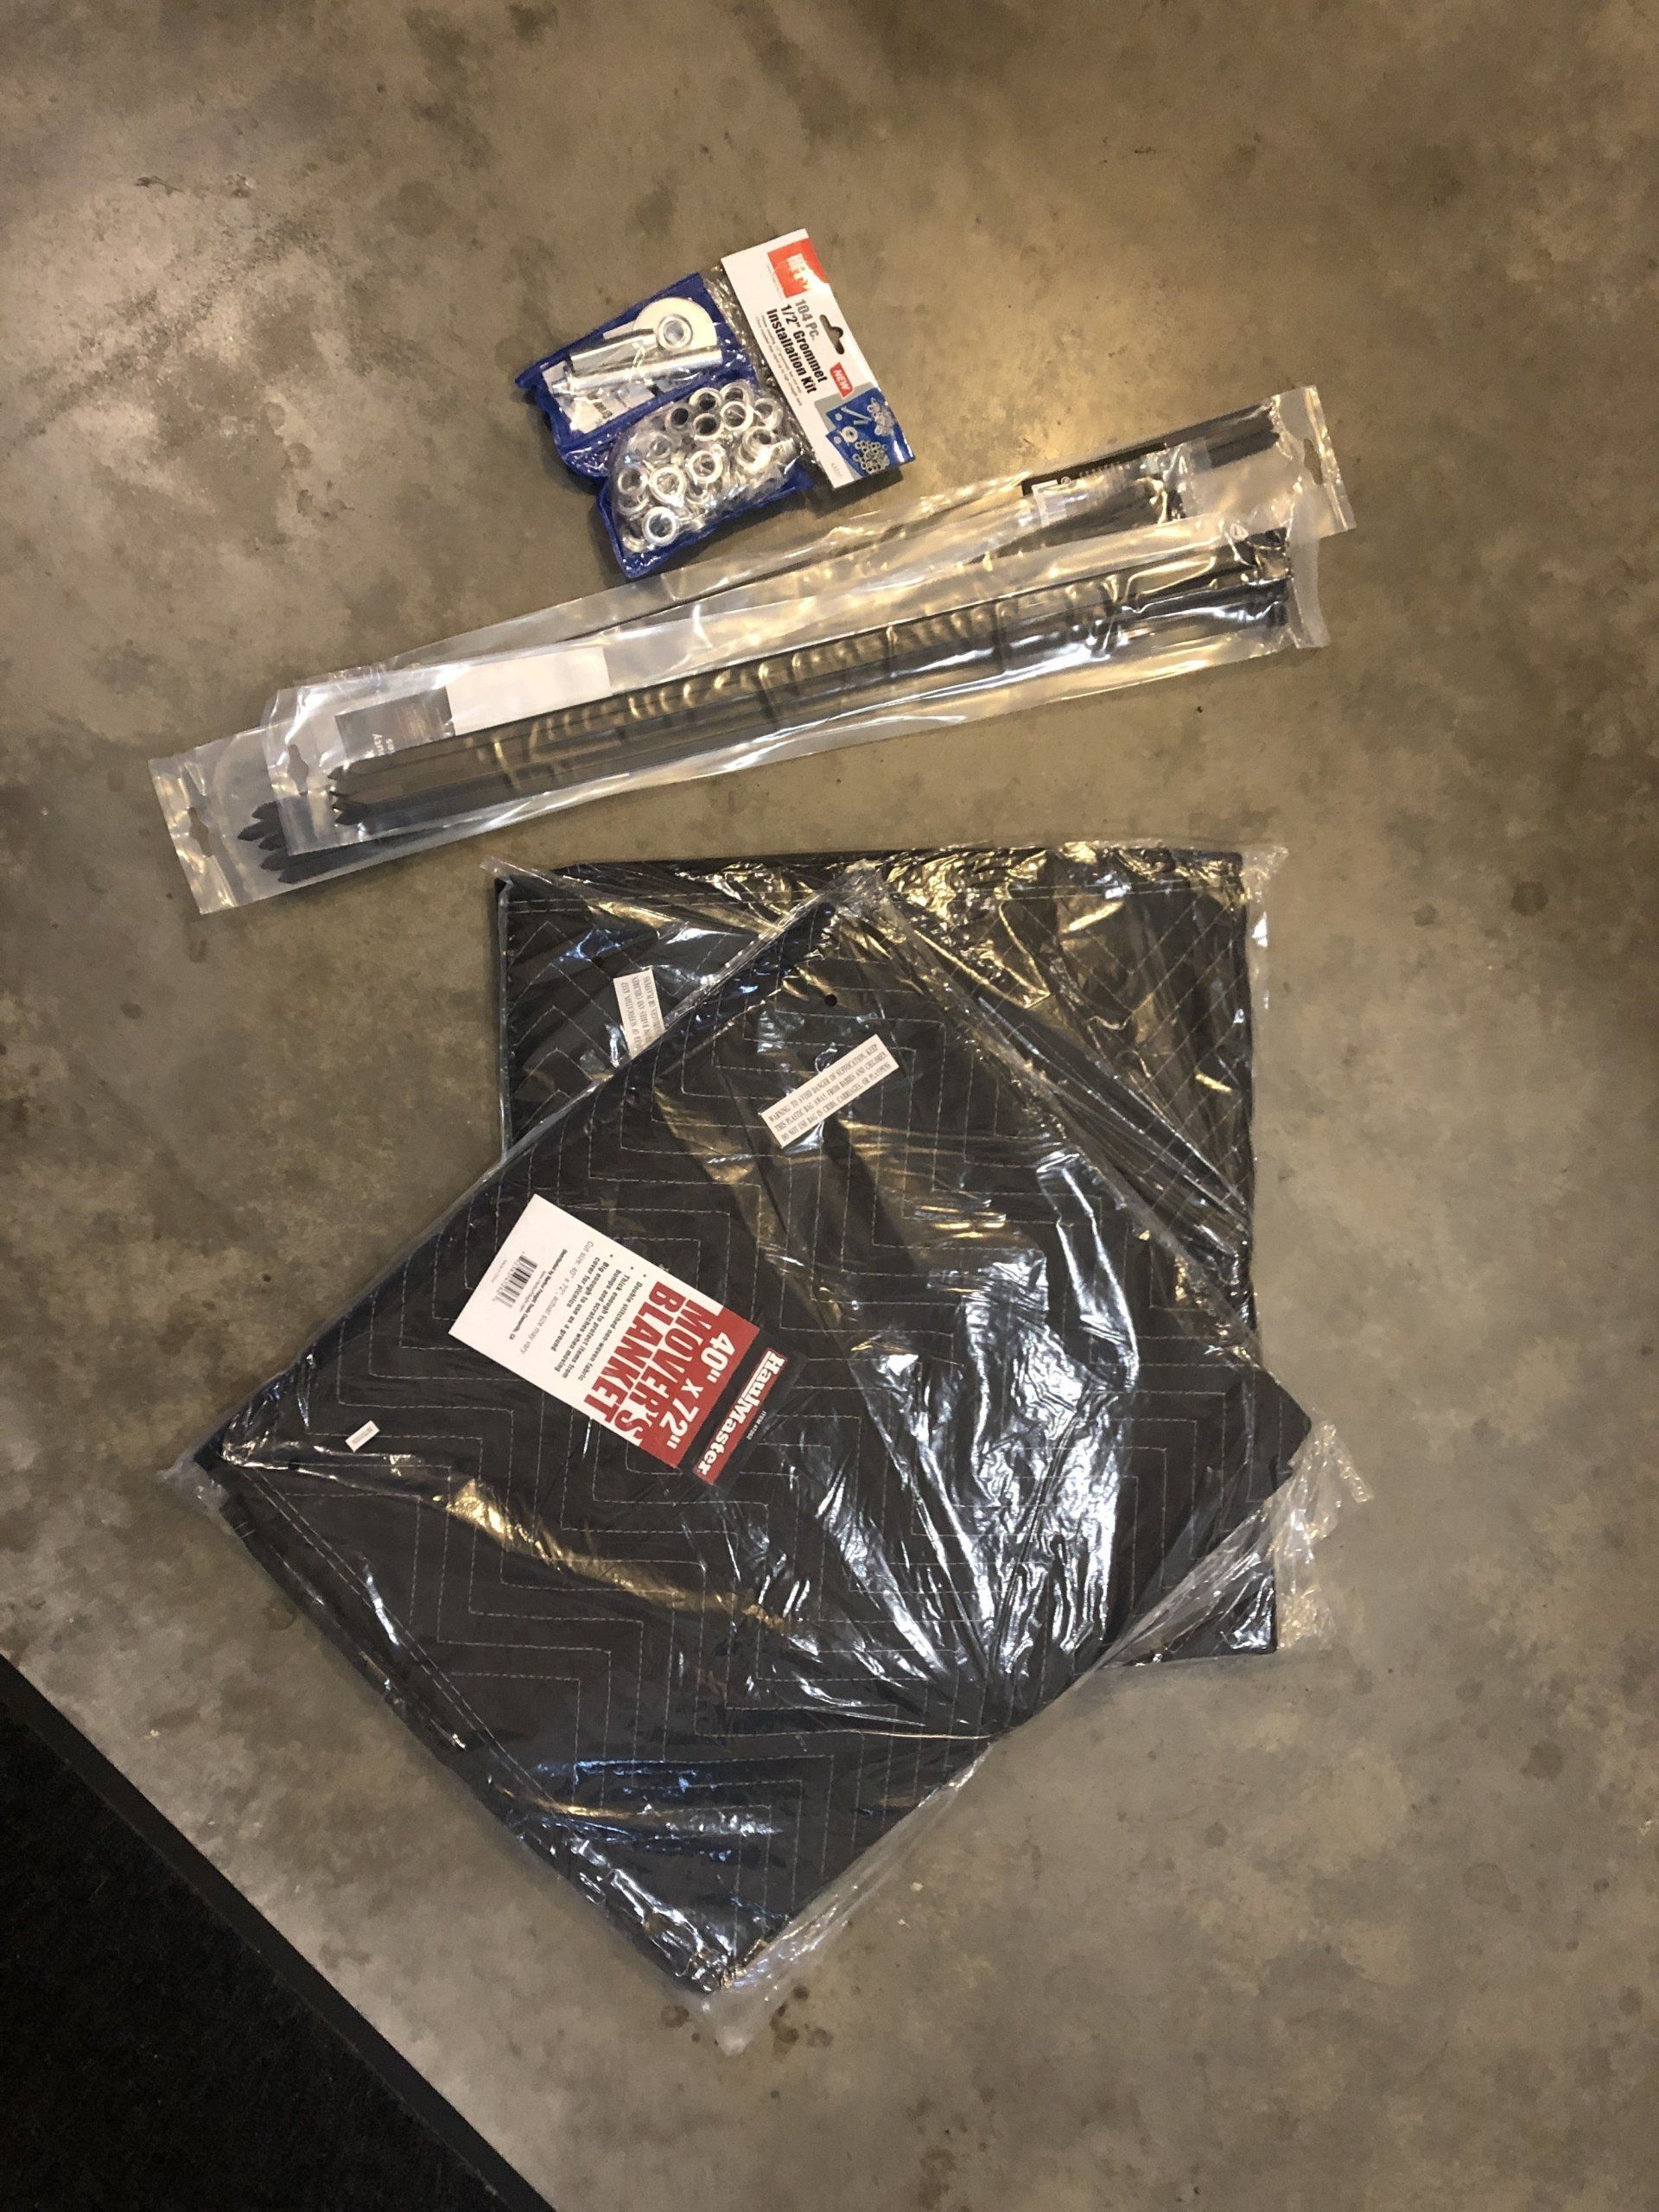
*items not mentioned because I got tired of typing: moving blankets ($20), canopy blankets ($40), grommet kit ($6), extra turf for sides ($30), zip-ties ($8),
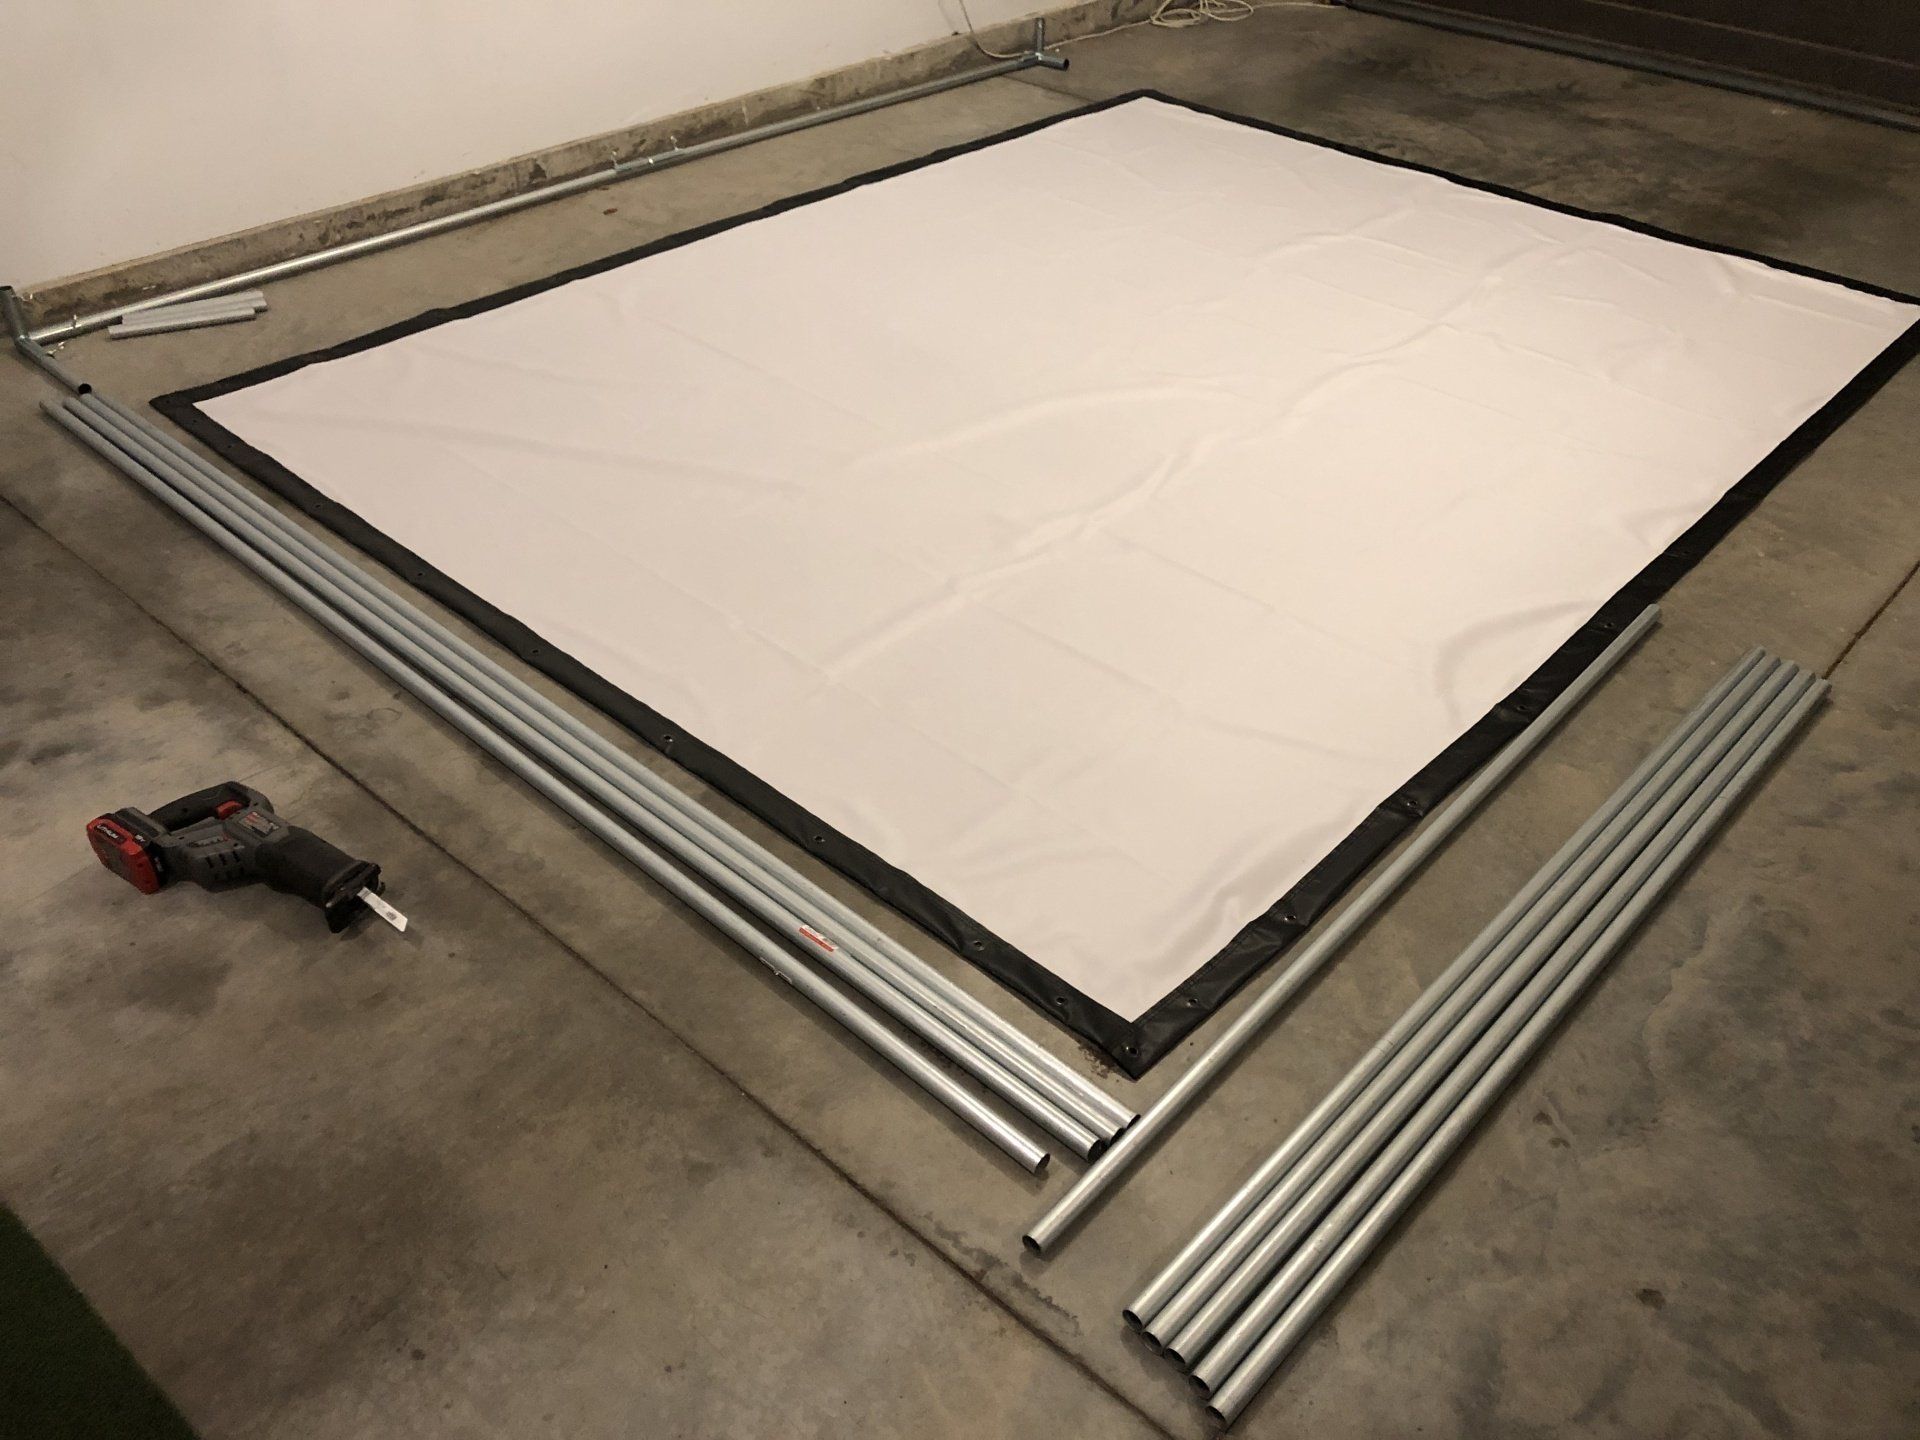
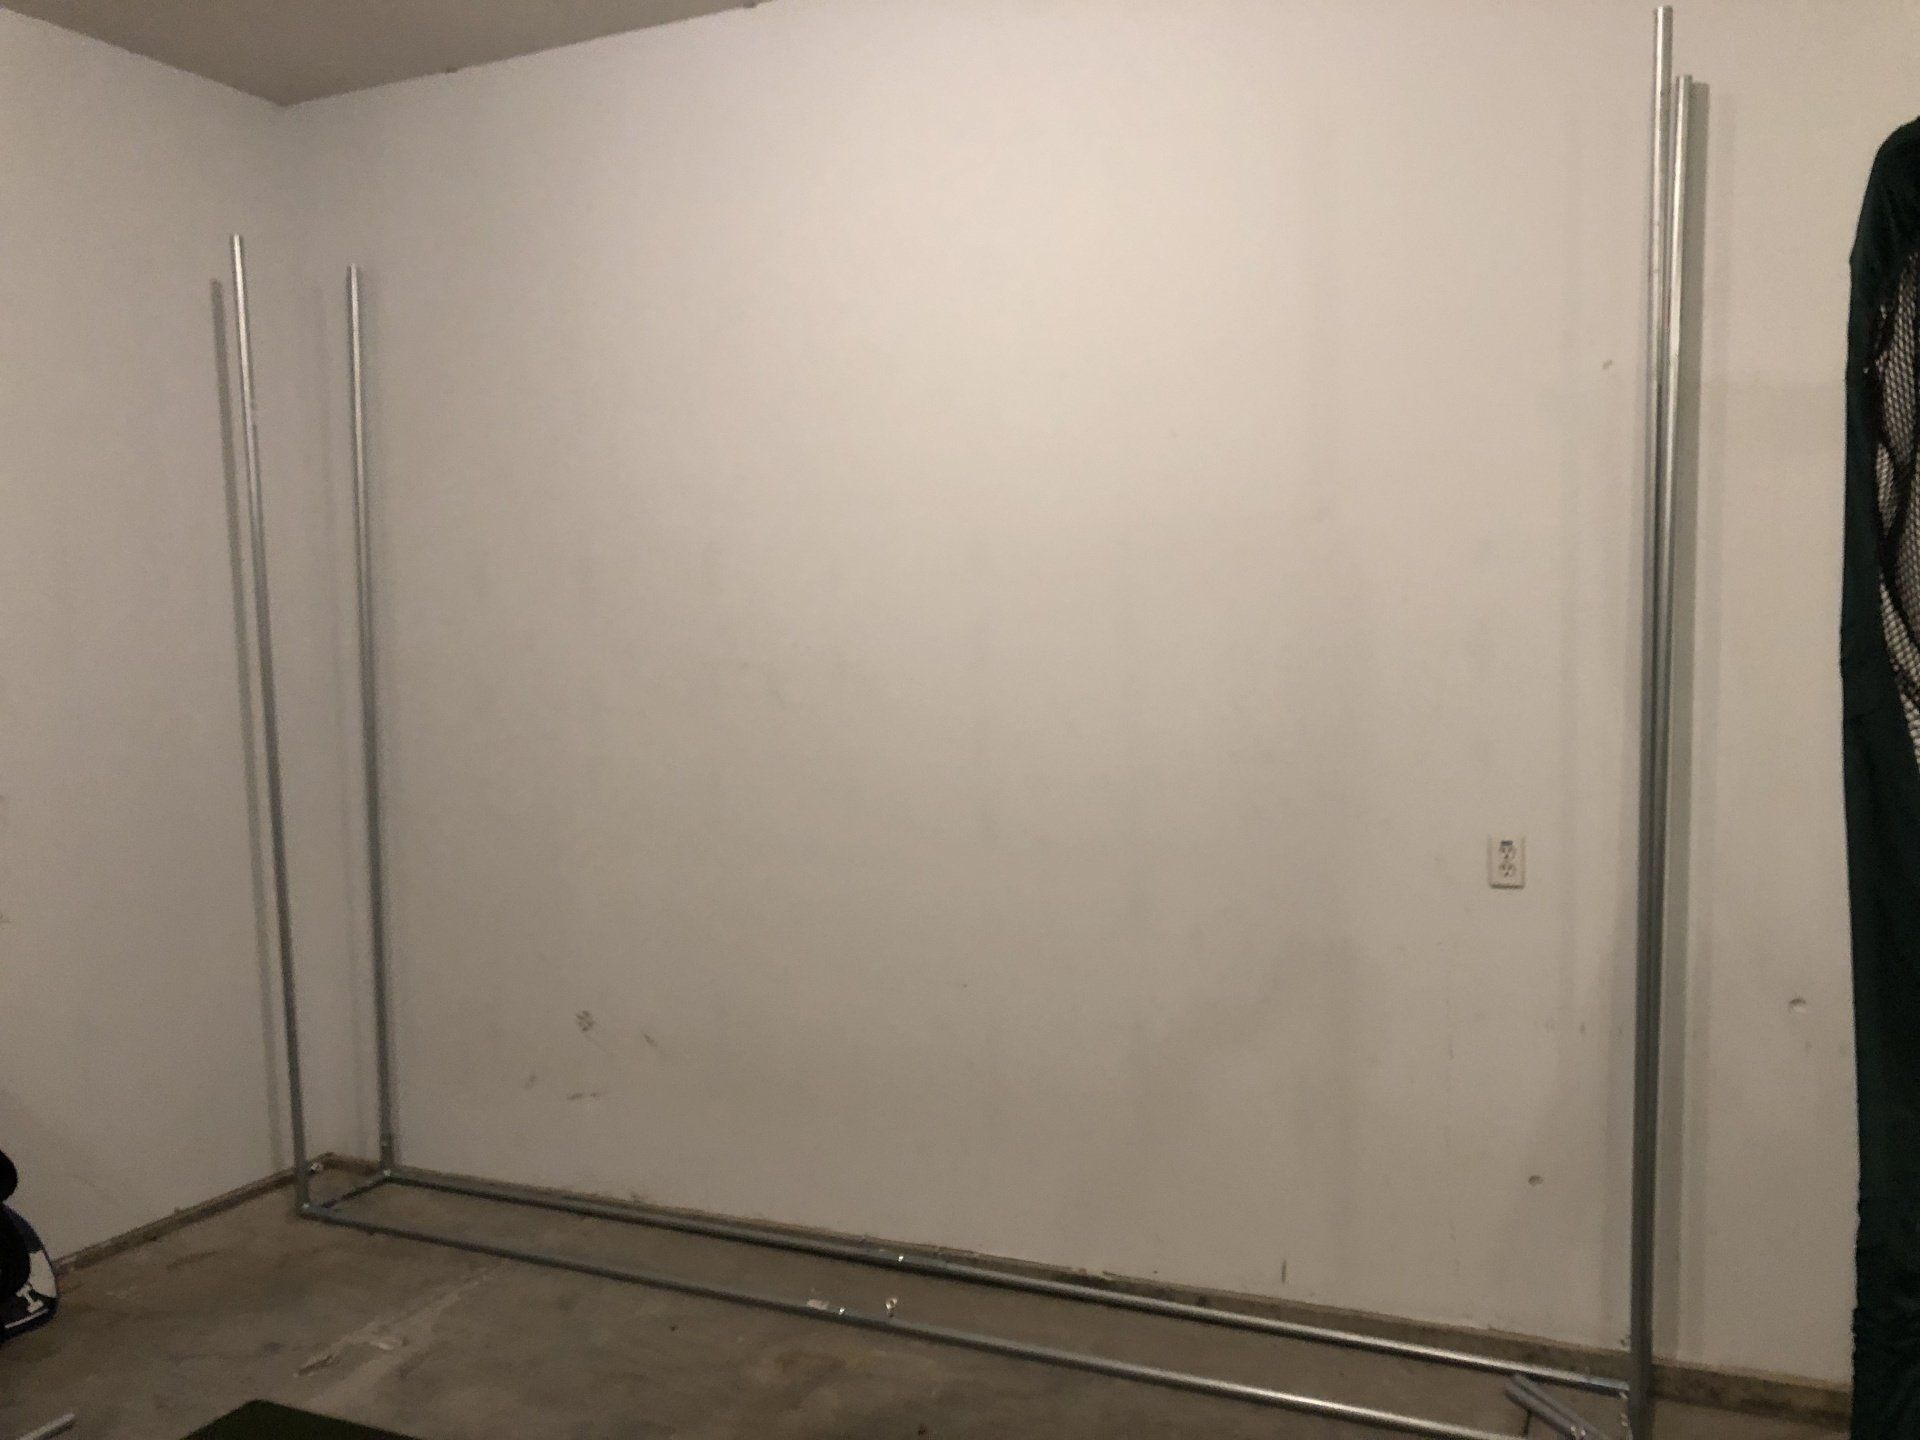
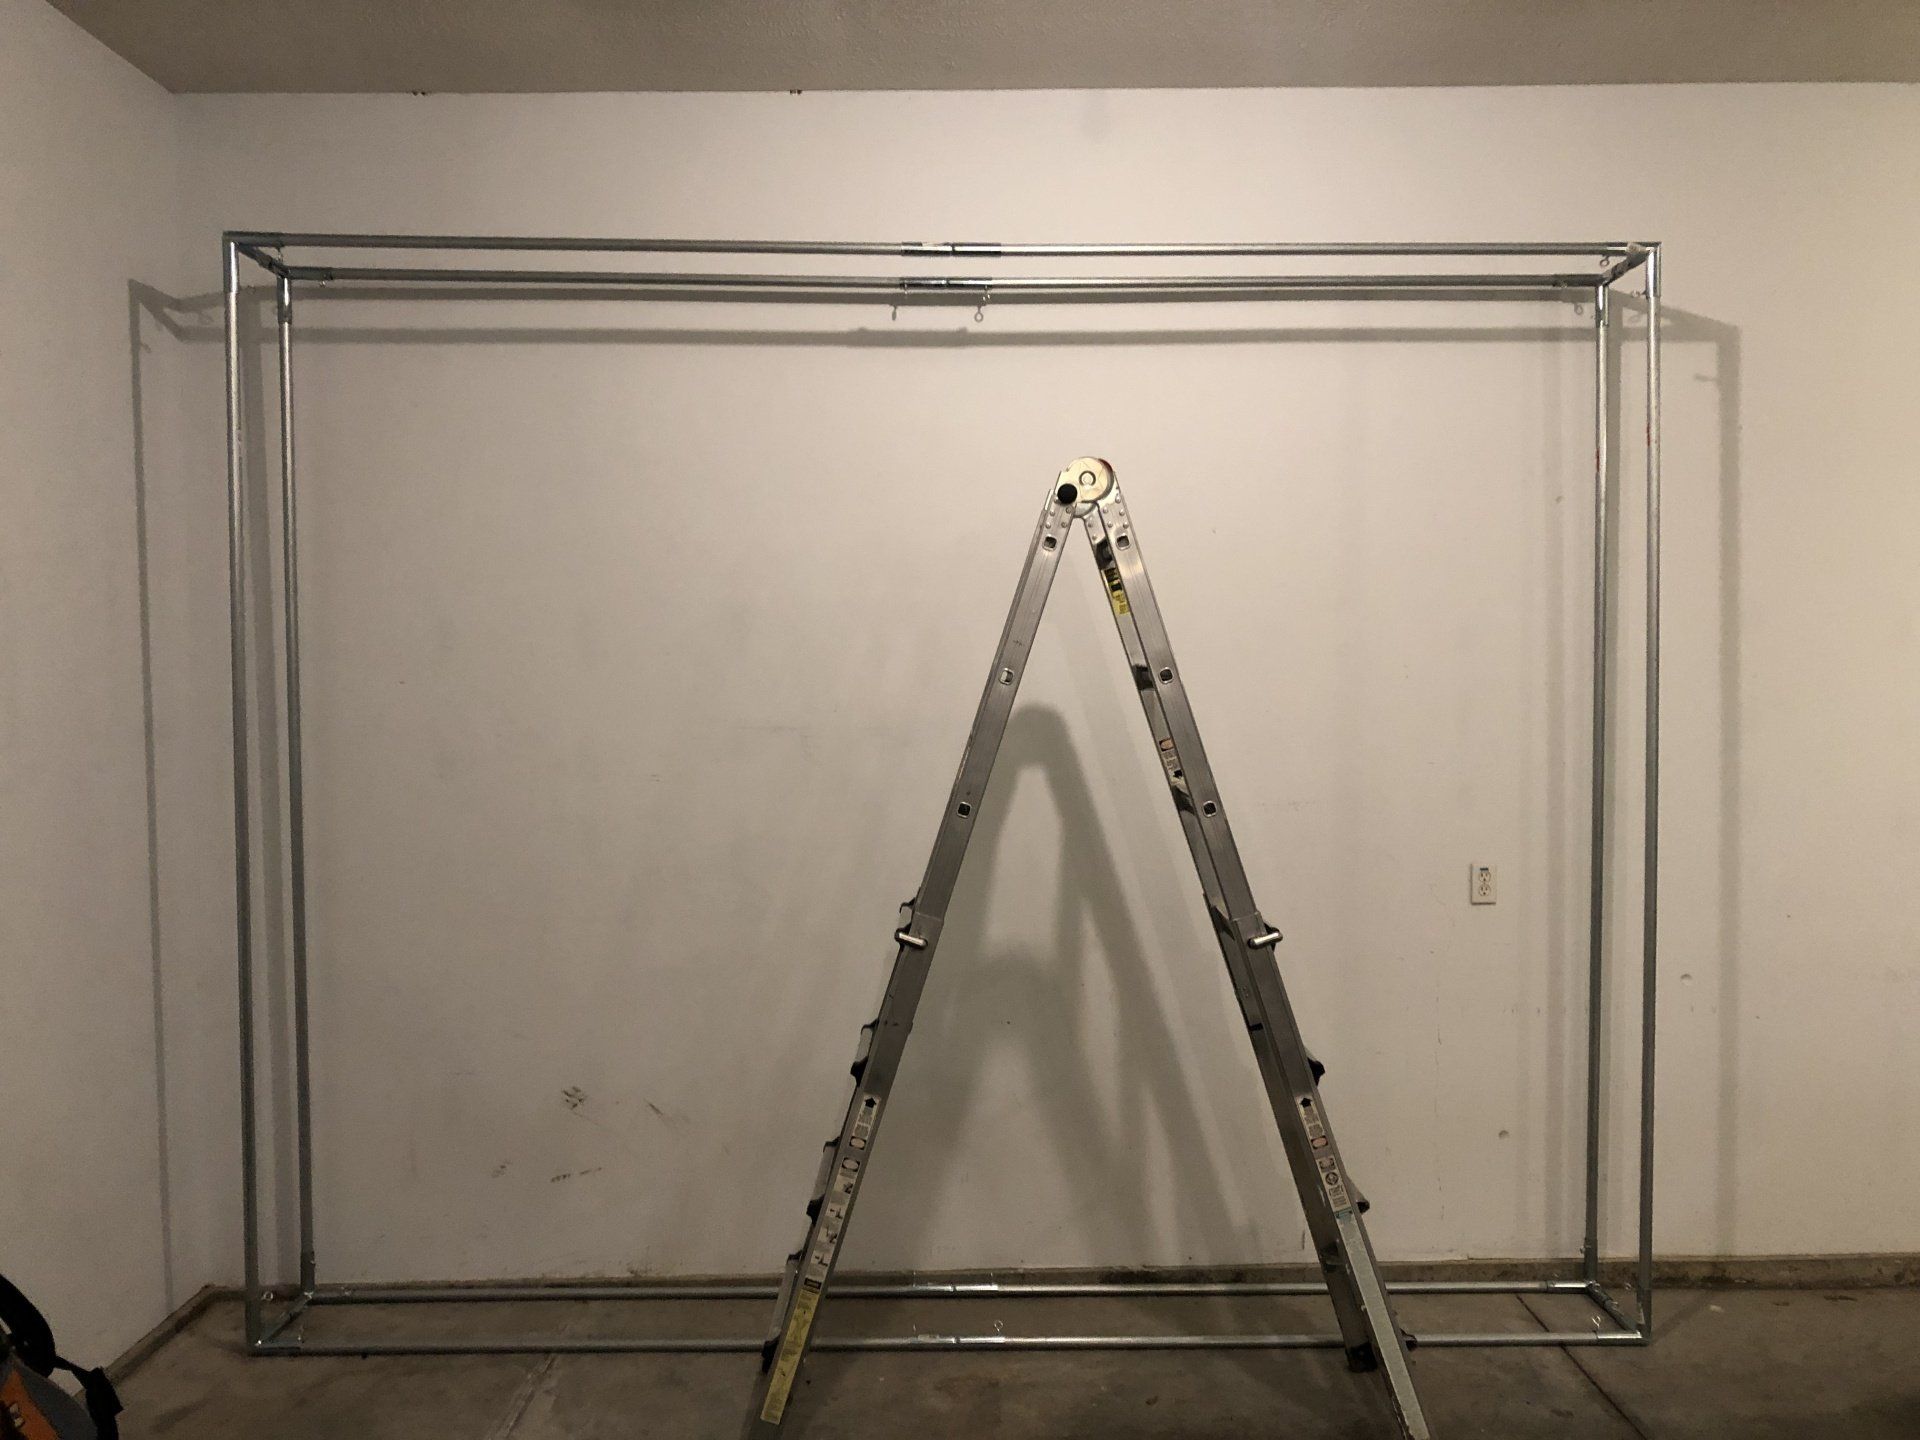
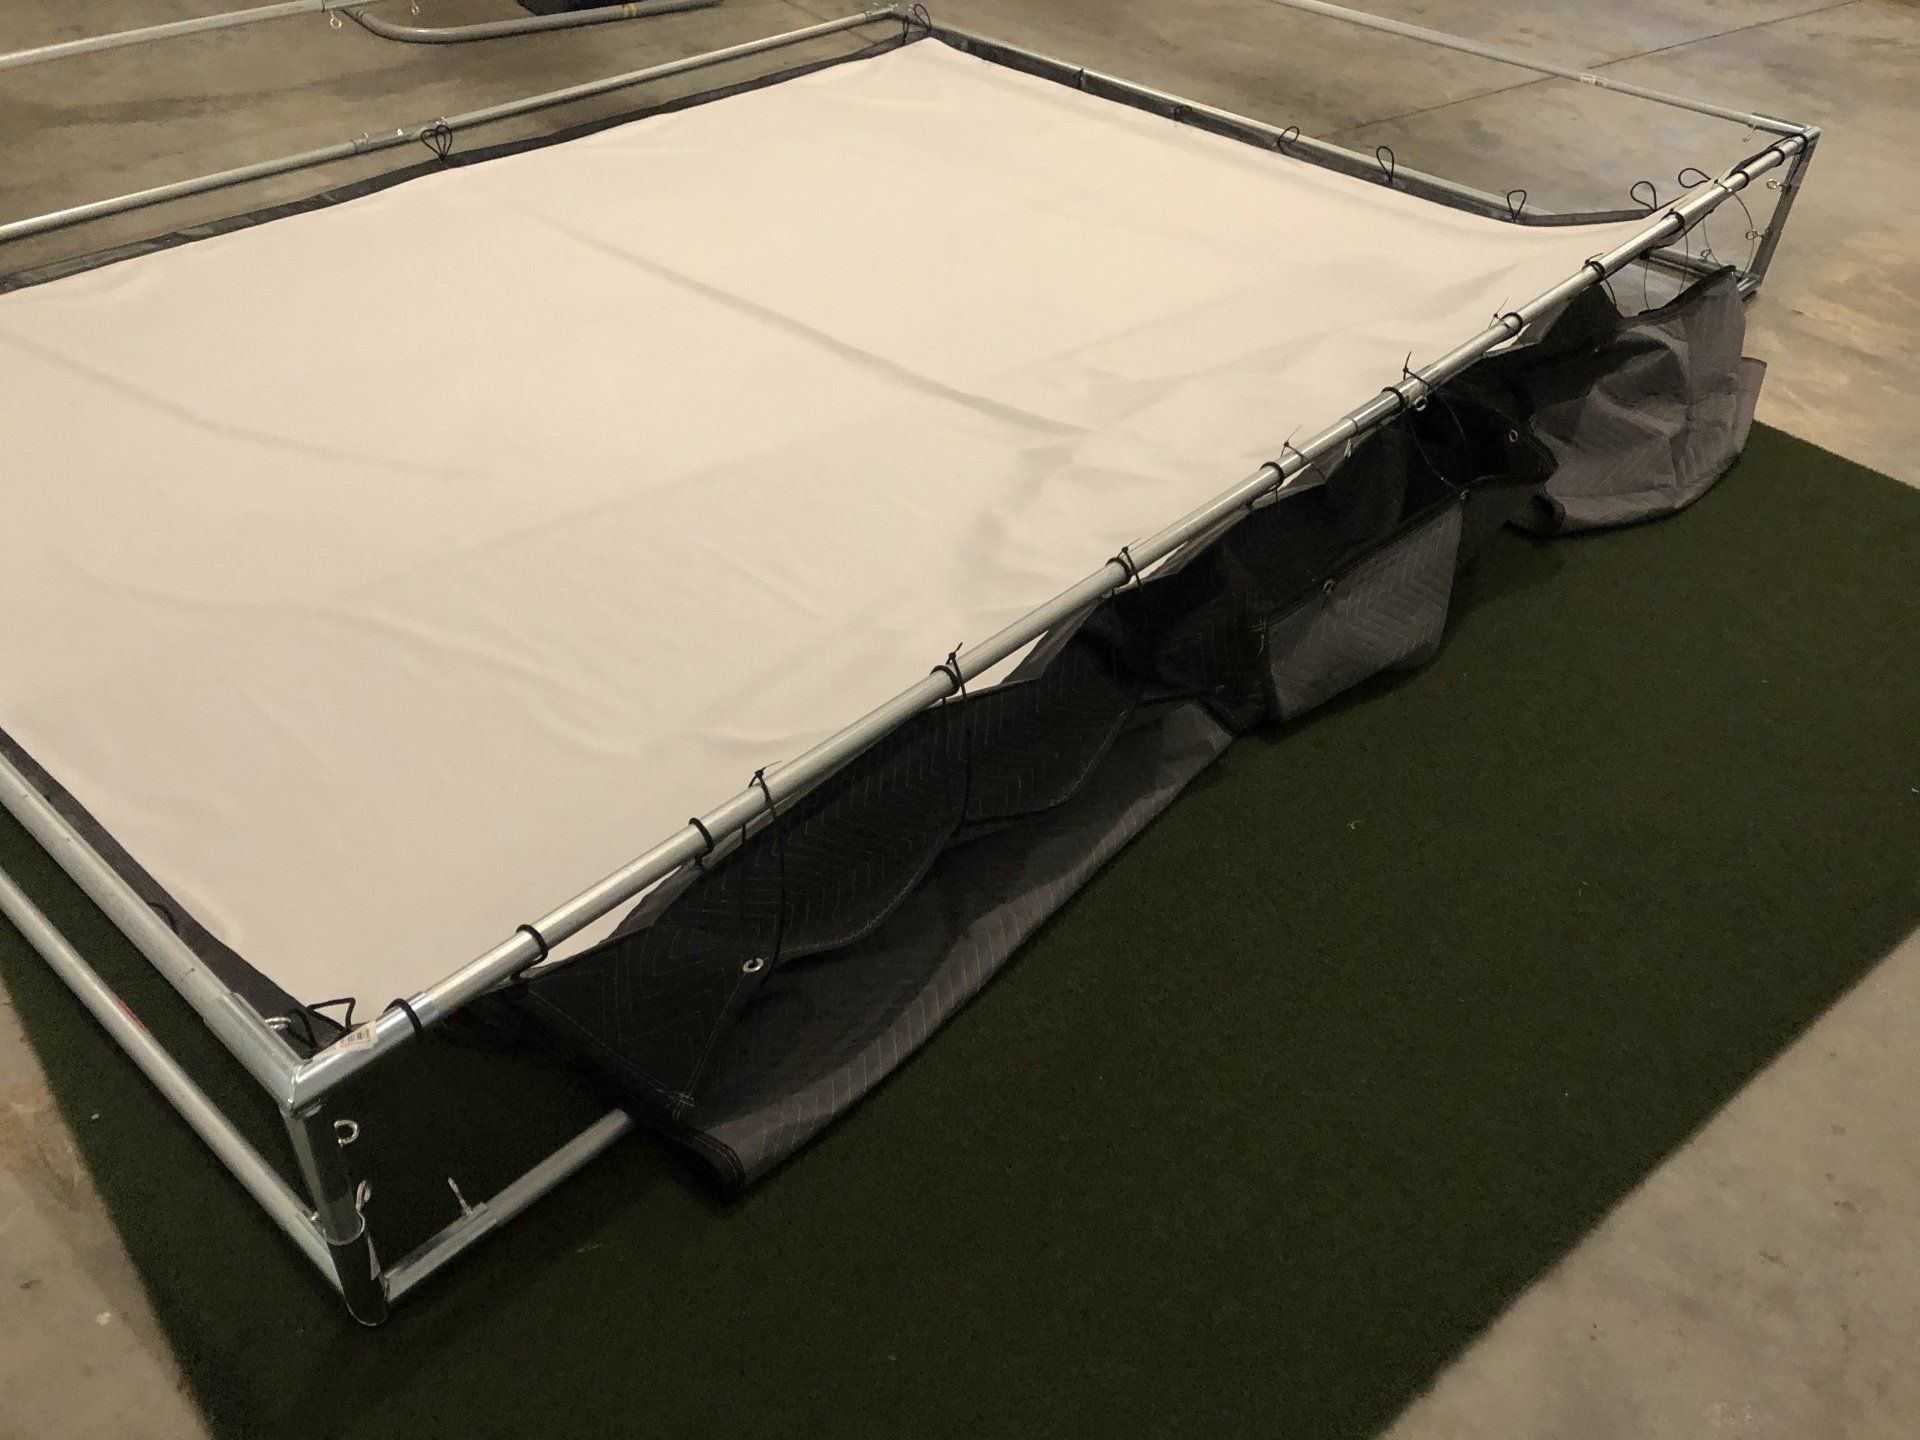
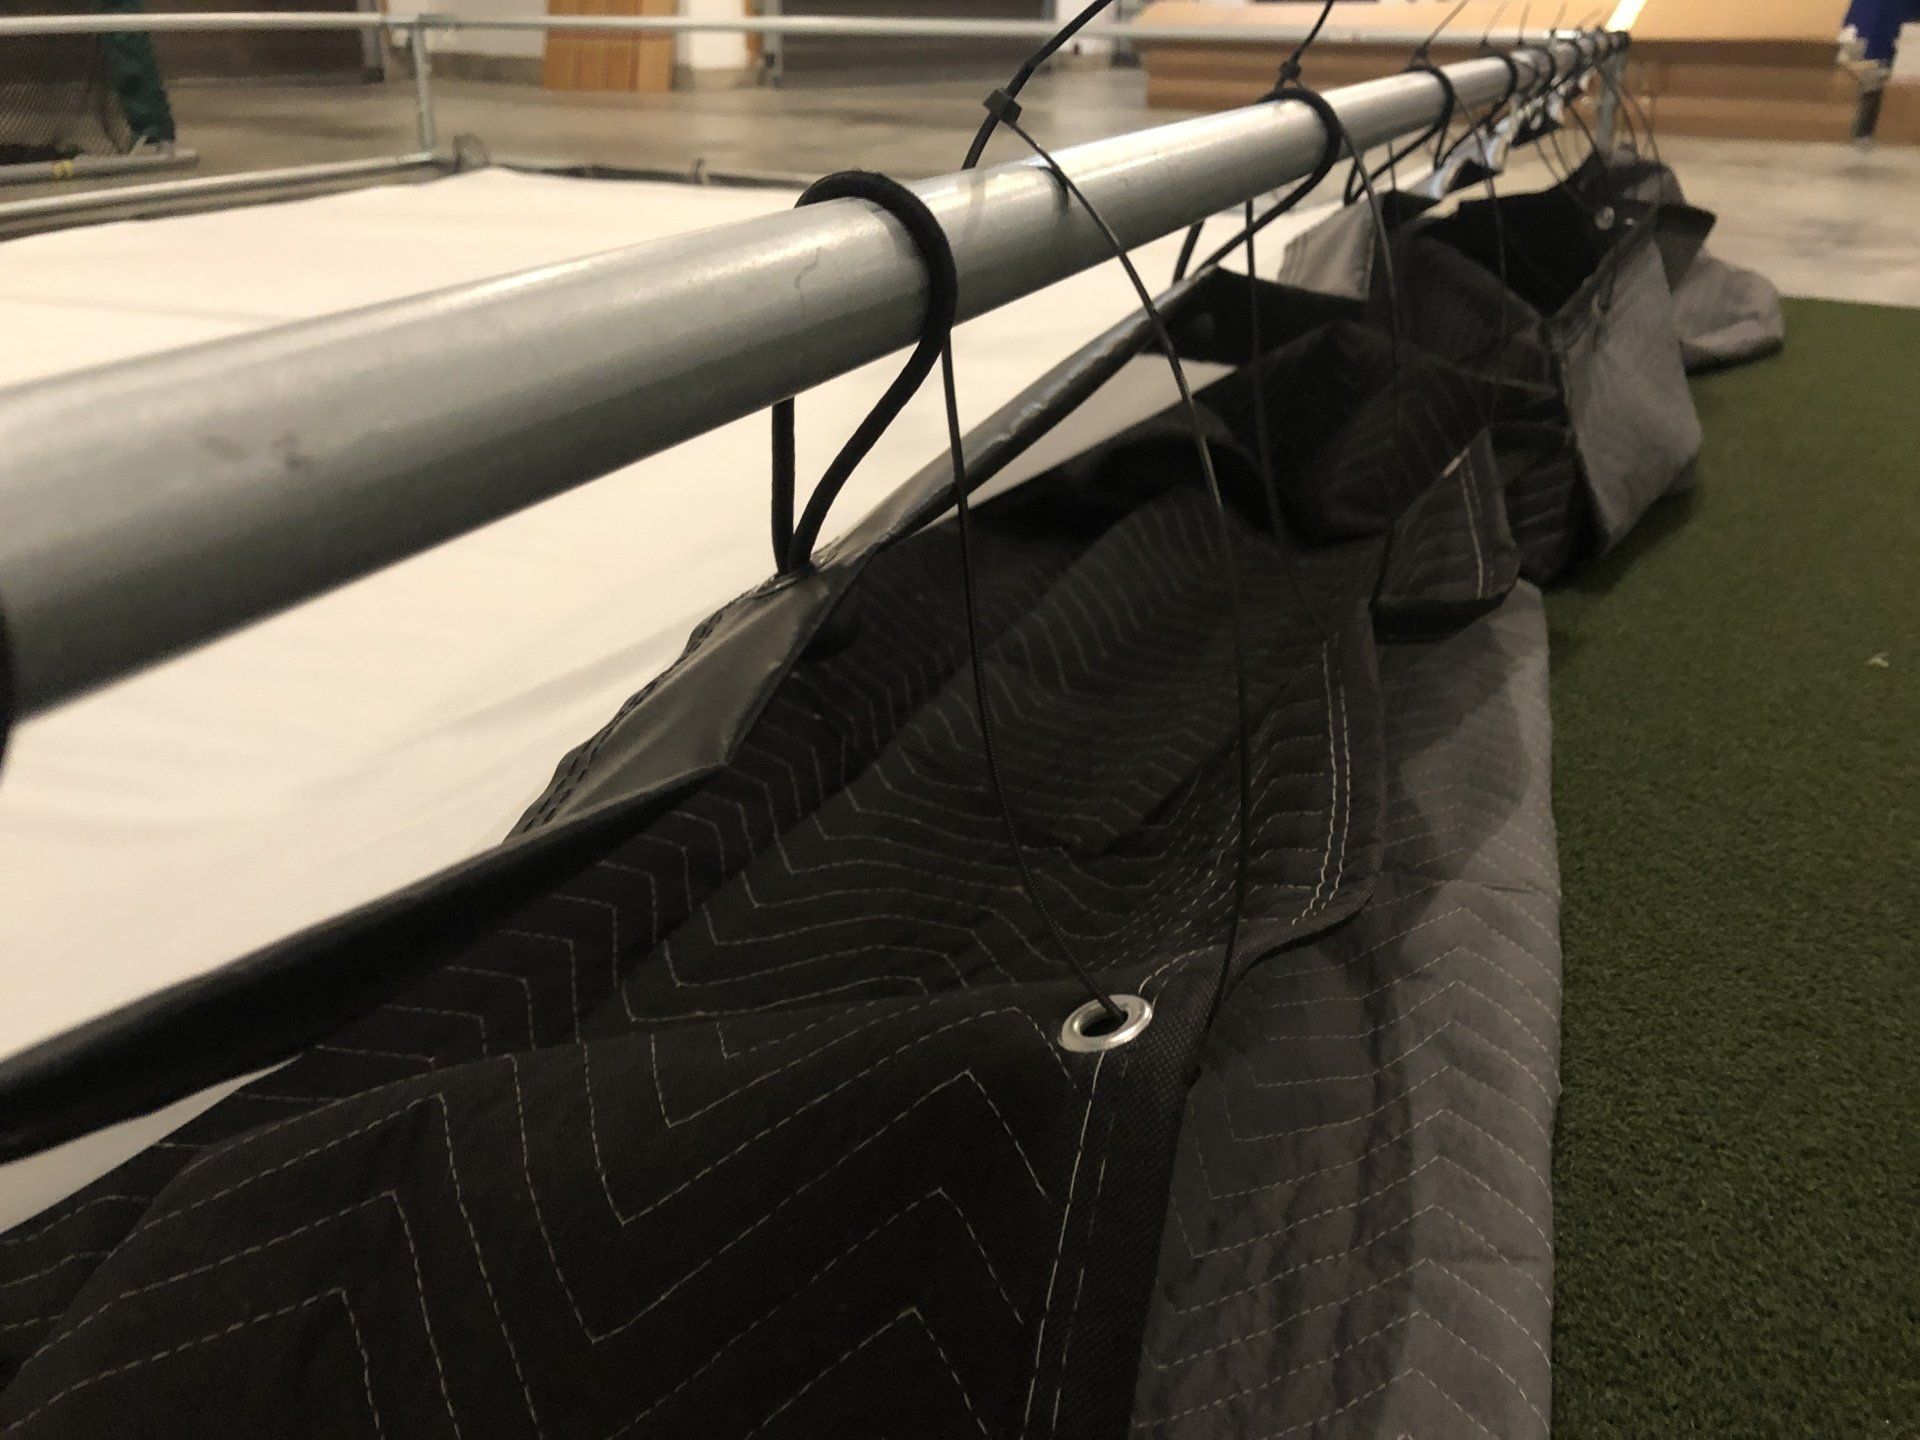
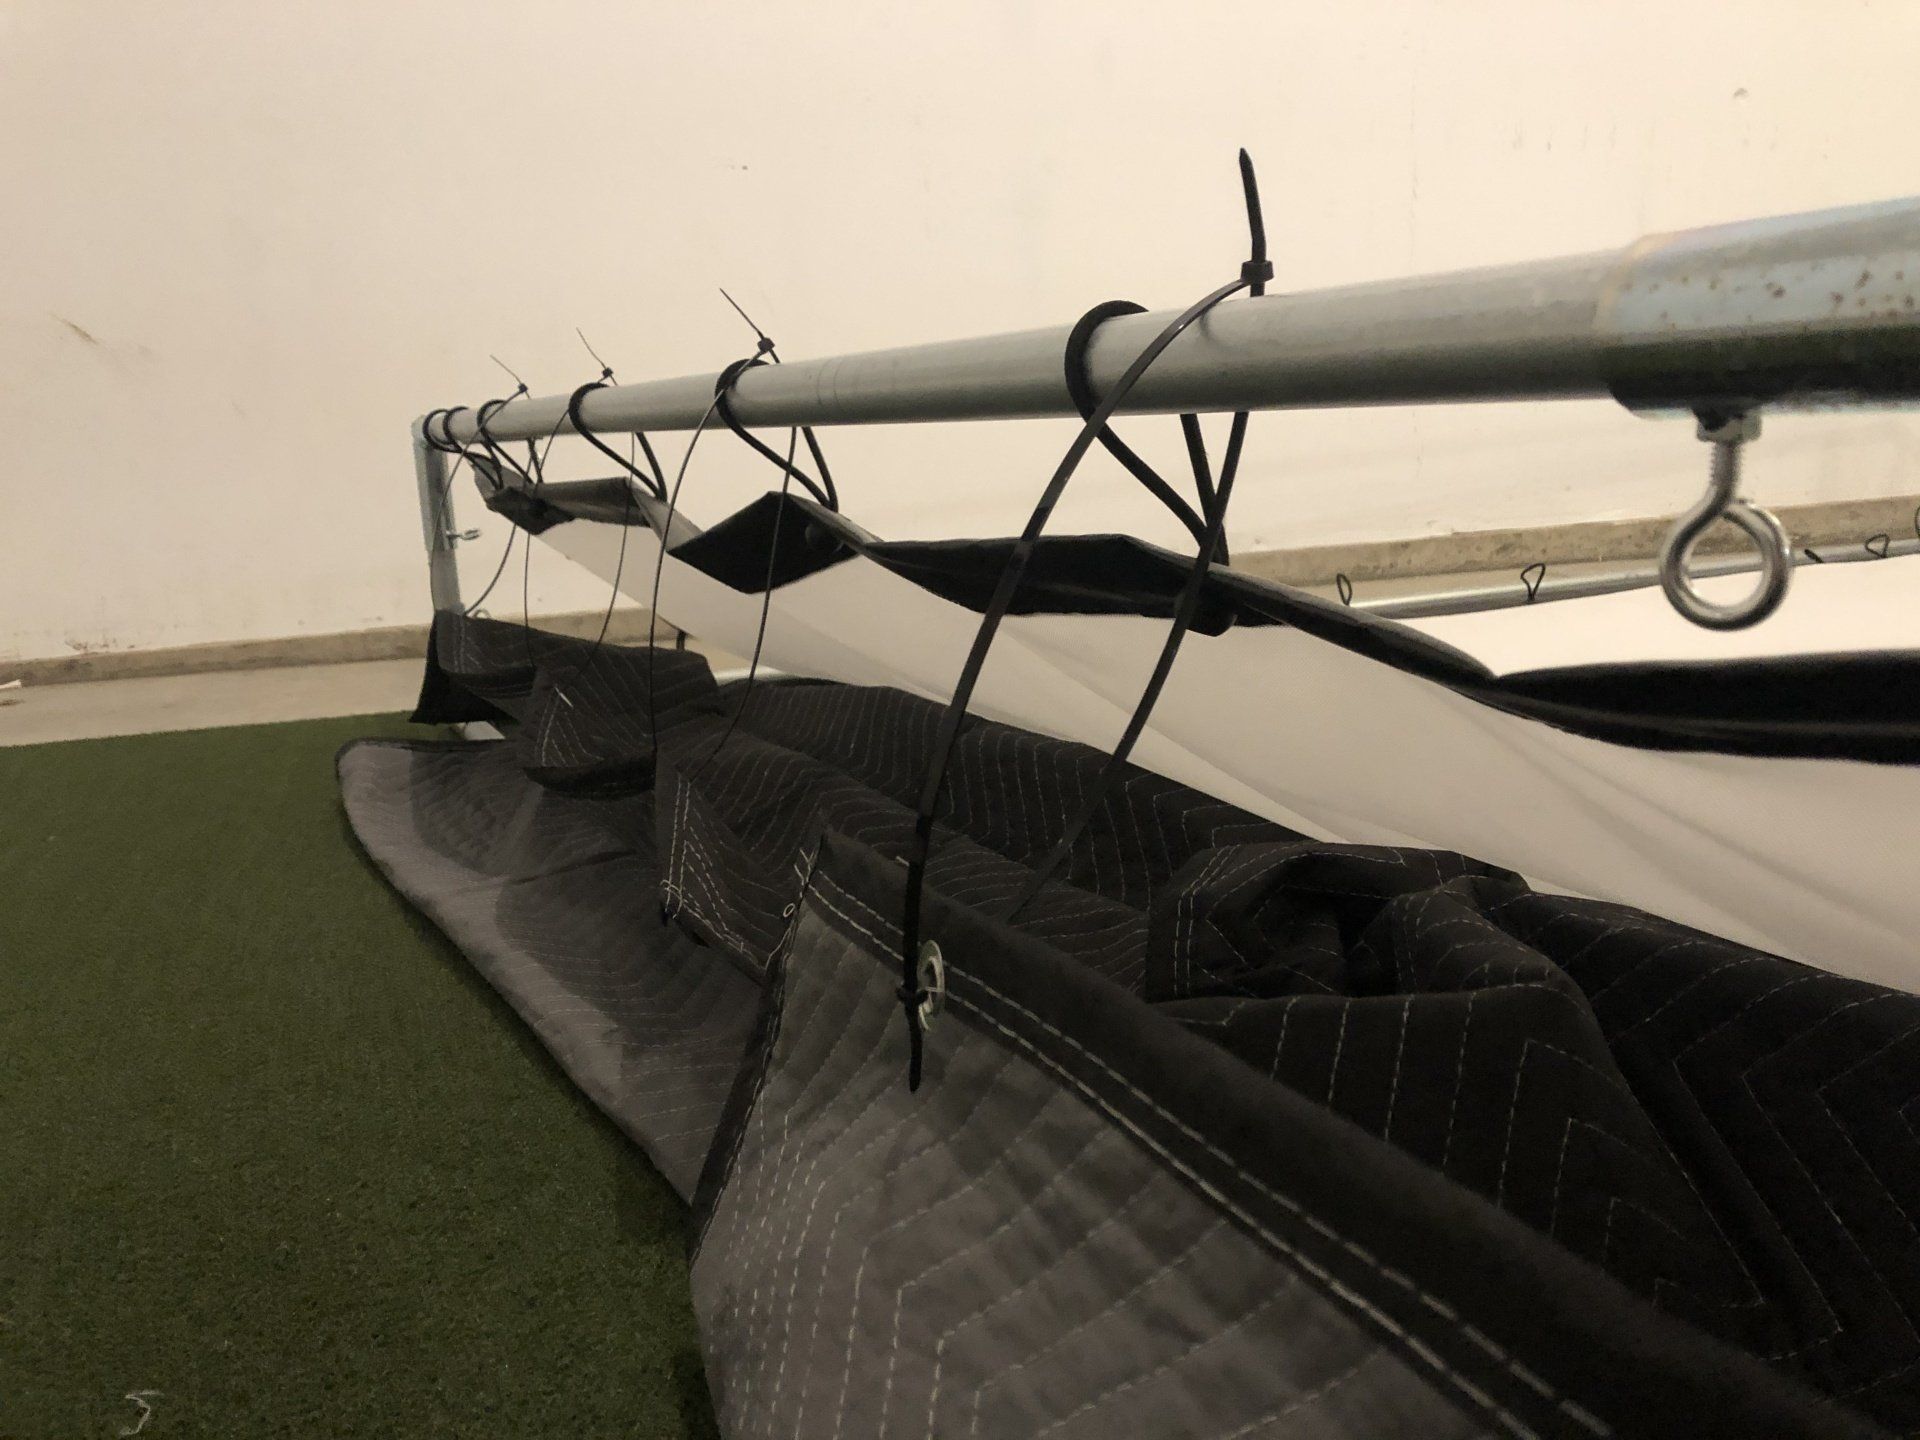
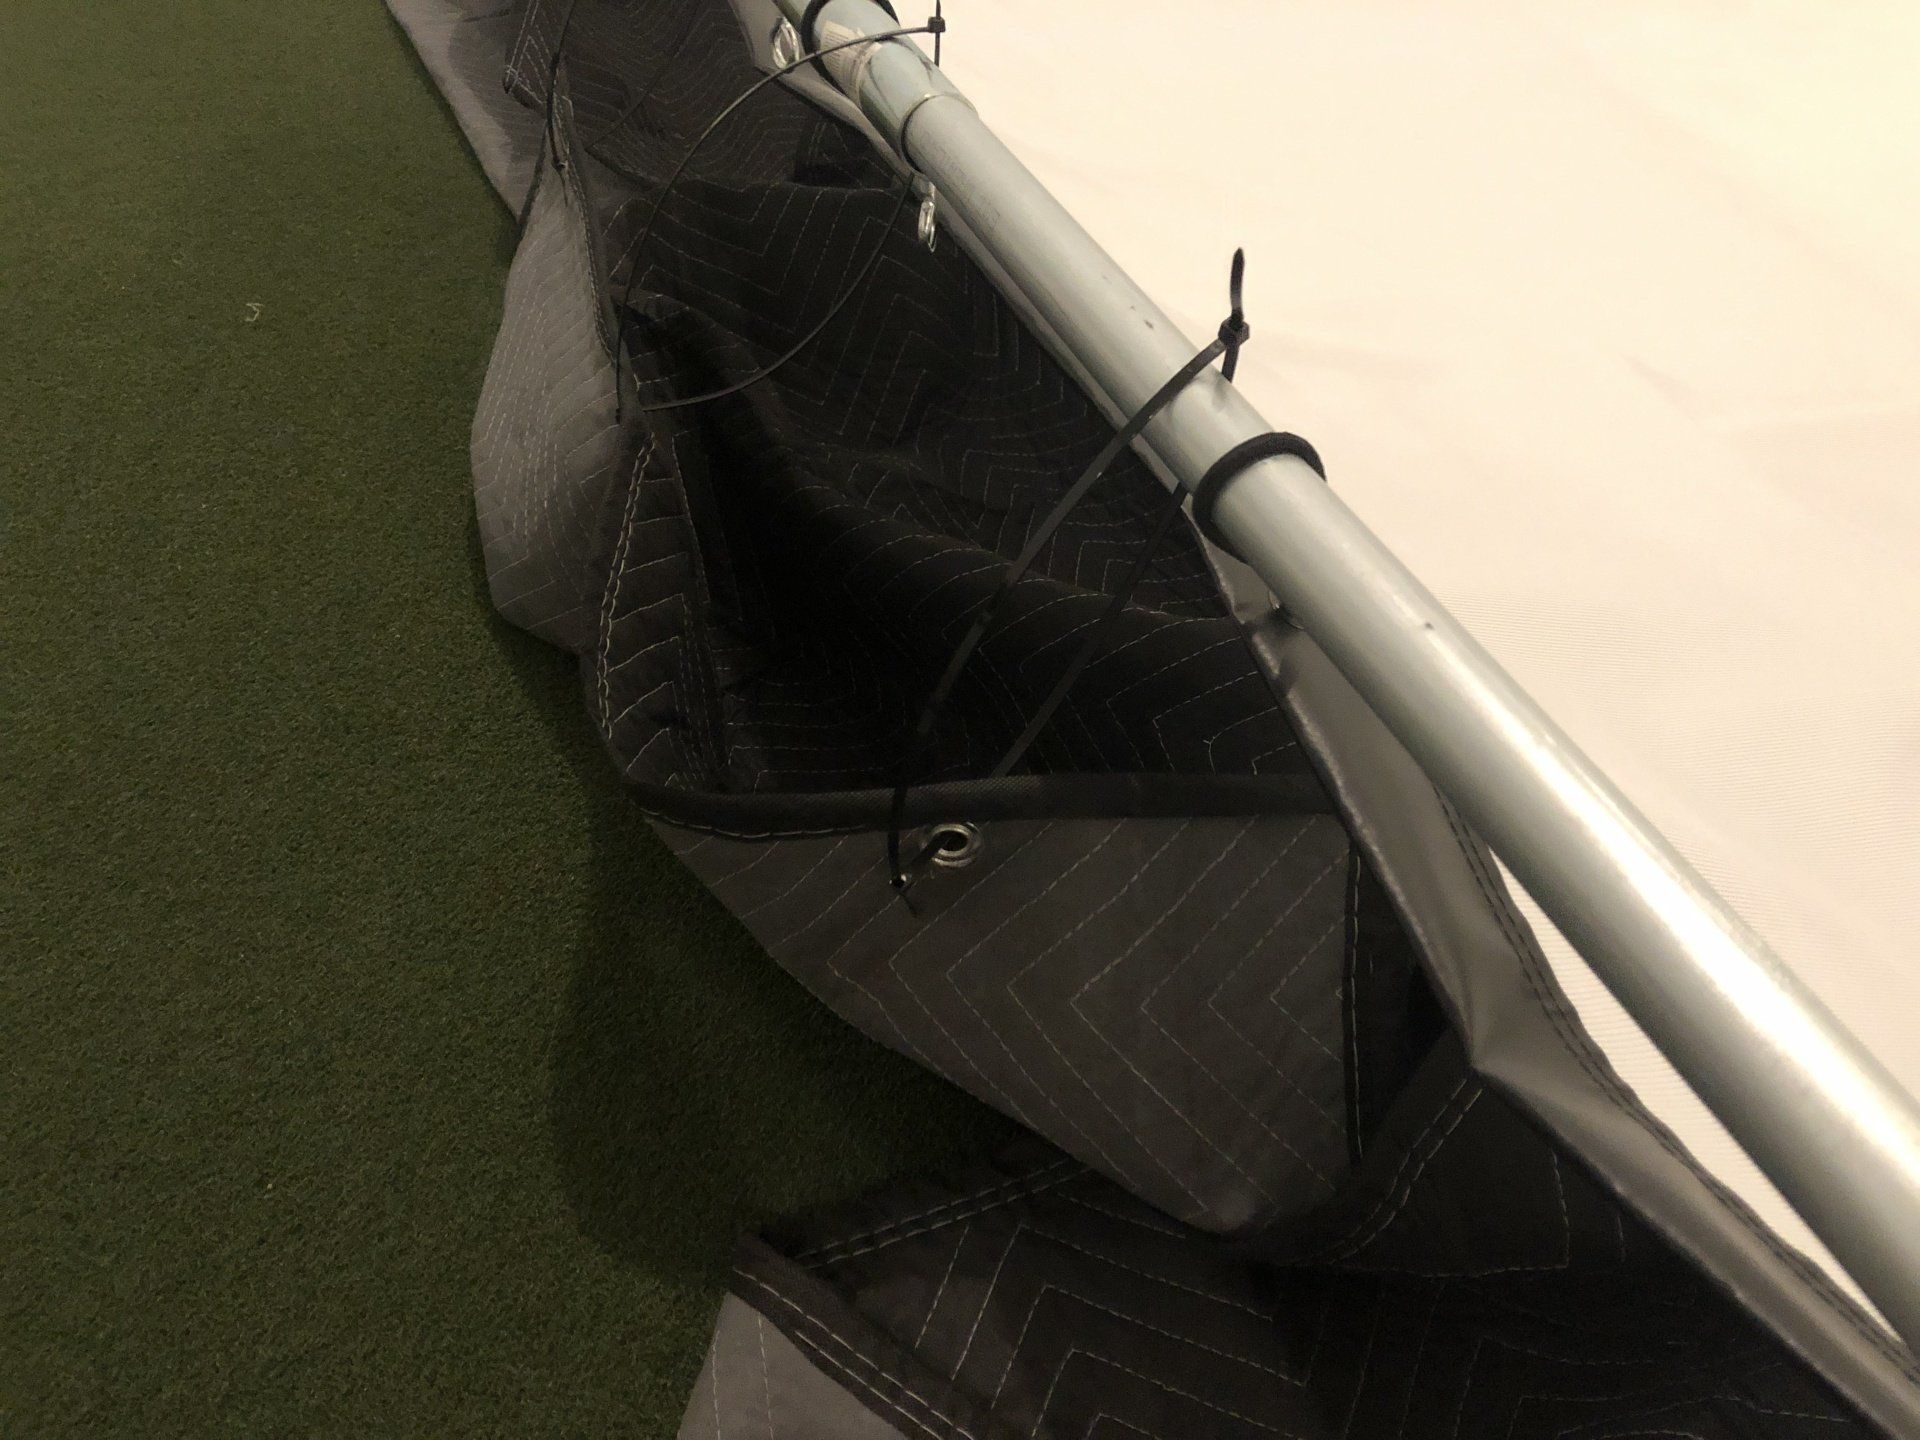
The Construction
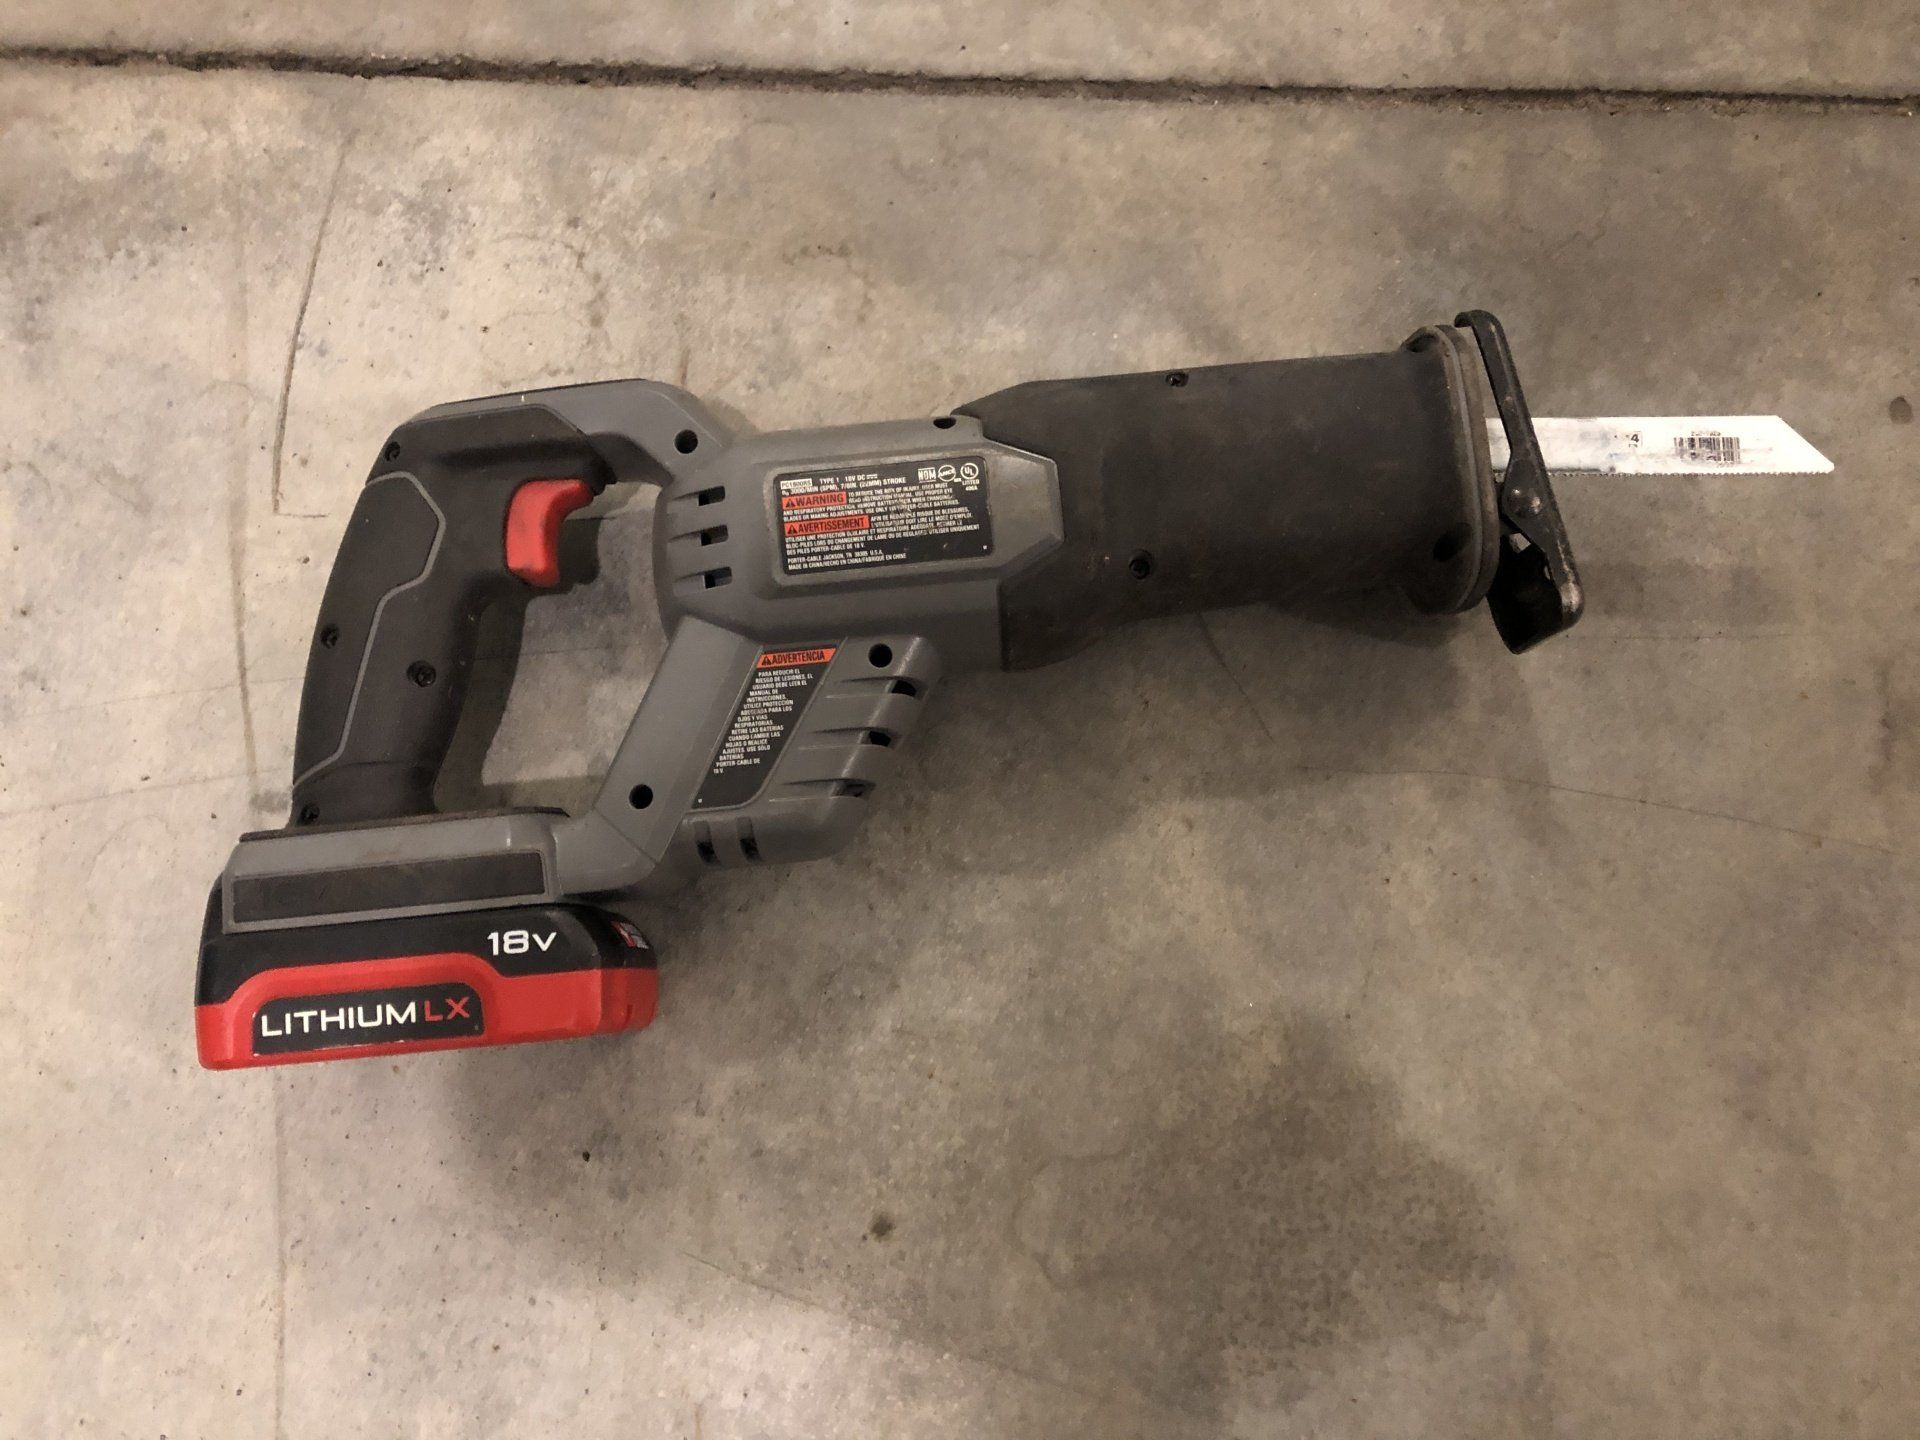
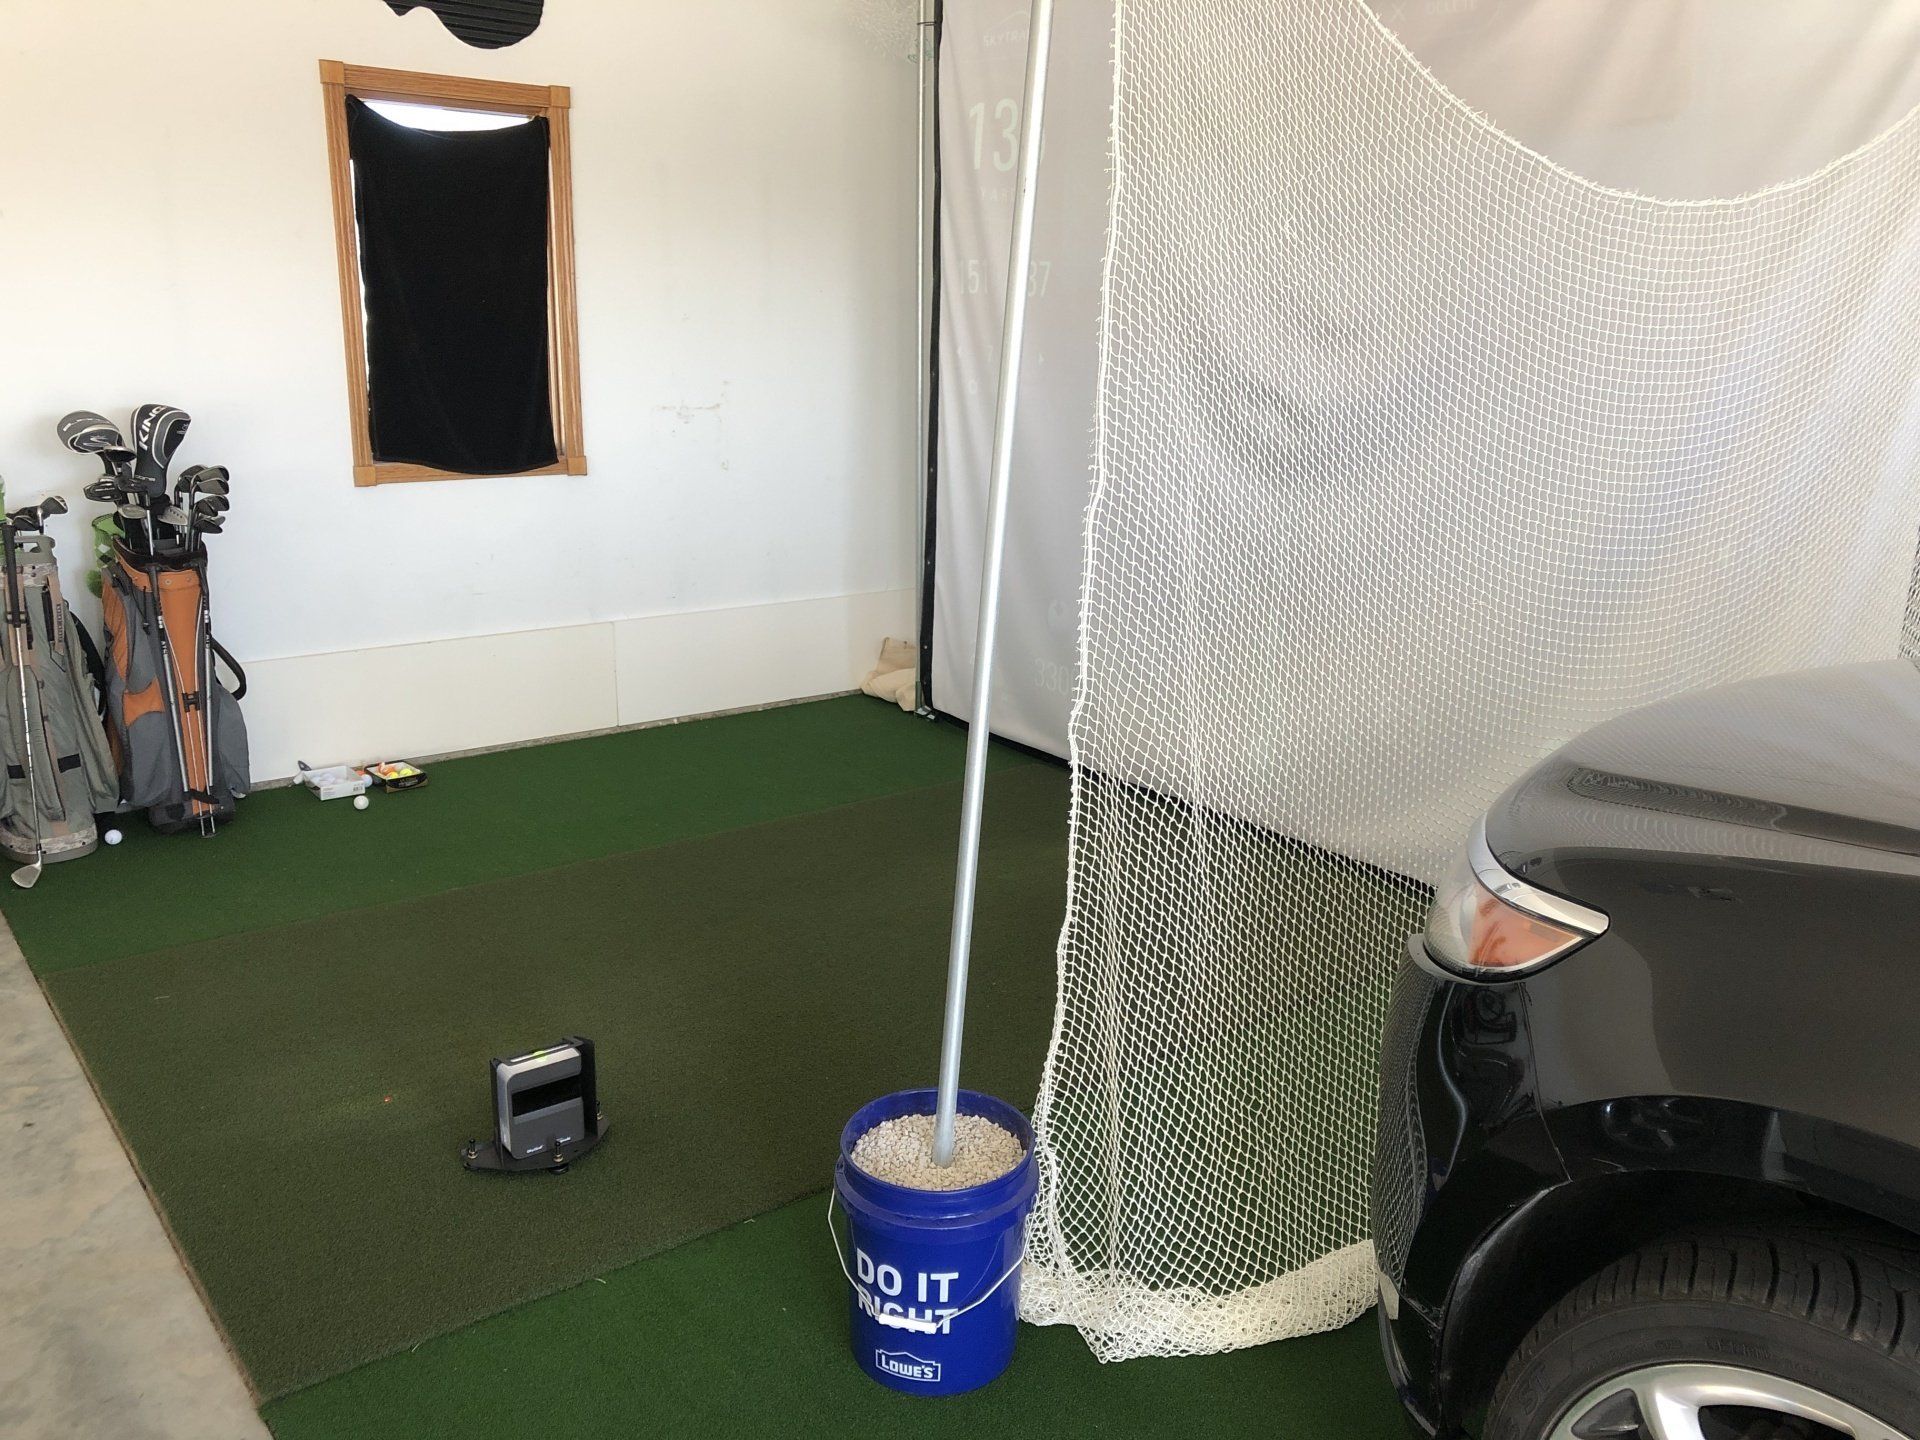
After I added this all up, I was surprised how expensive this project had become. Building the frame enclosure for the screen is by far the most time consuming. Here is some images of the project.


View more
DO's & Don'ts
- Don't go any less than 3000 lumens projector and make sure it's a short throw. Great website to calculate your distances: Projector Throw Calculator. The dimmer the image the further back your projector is.
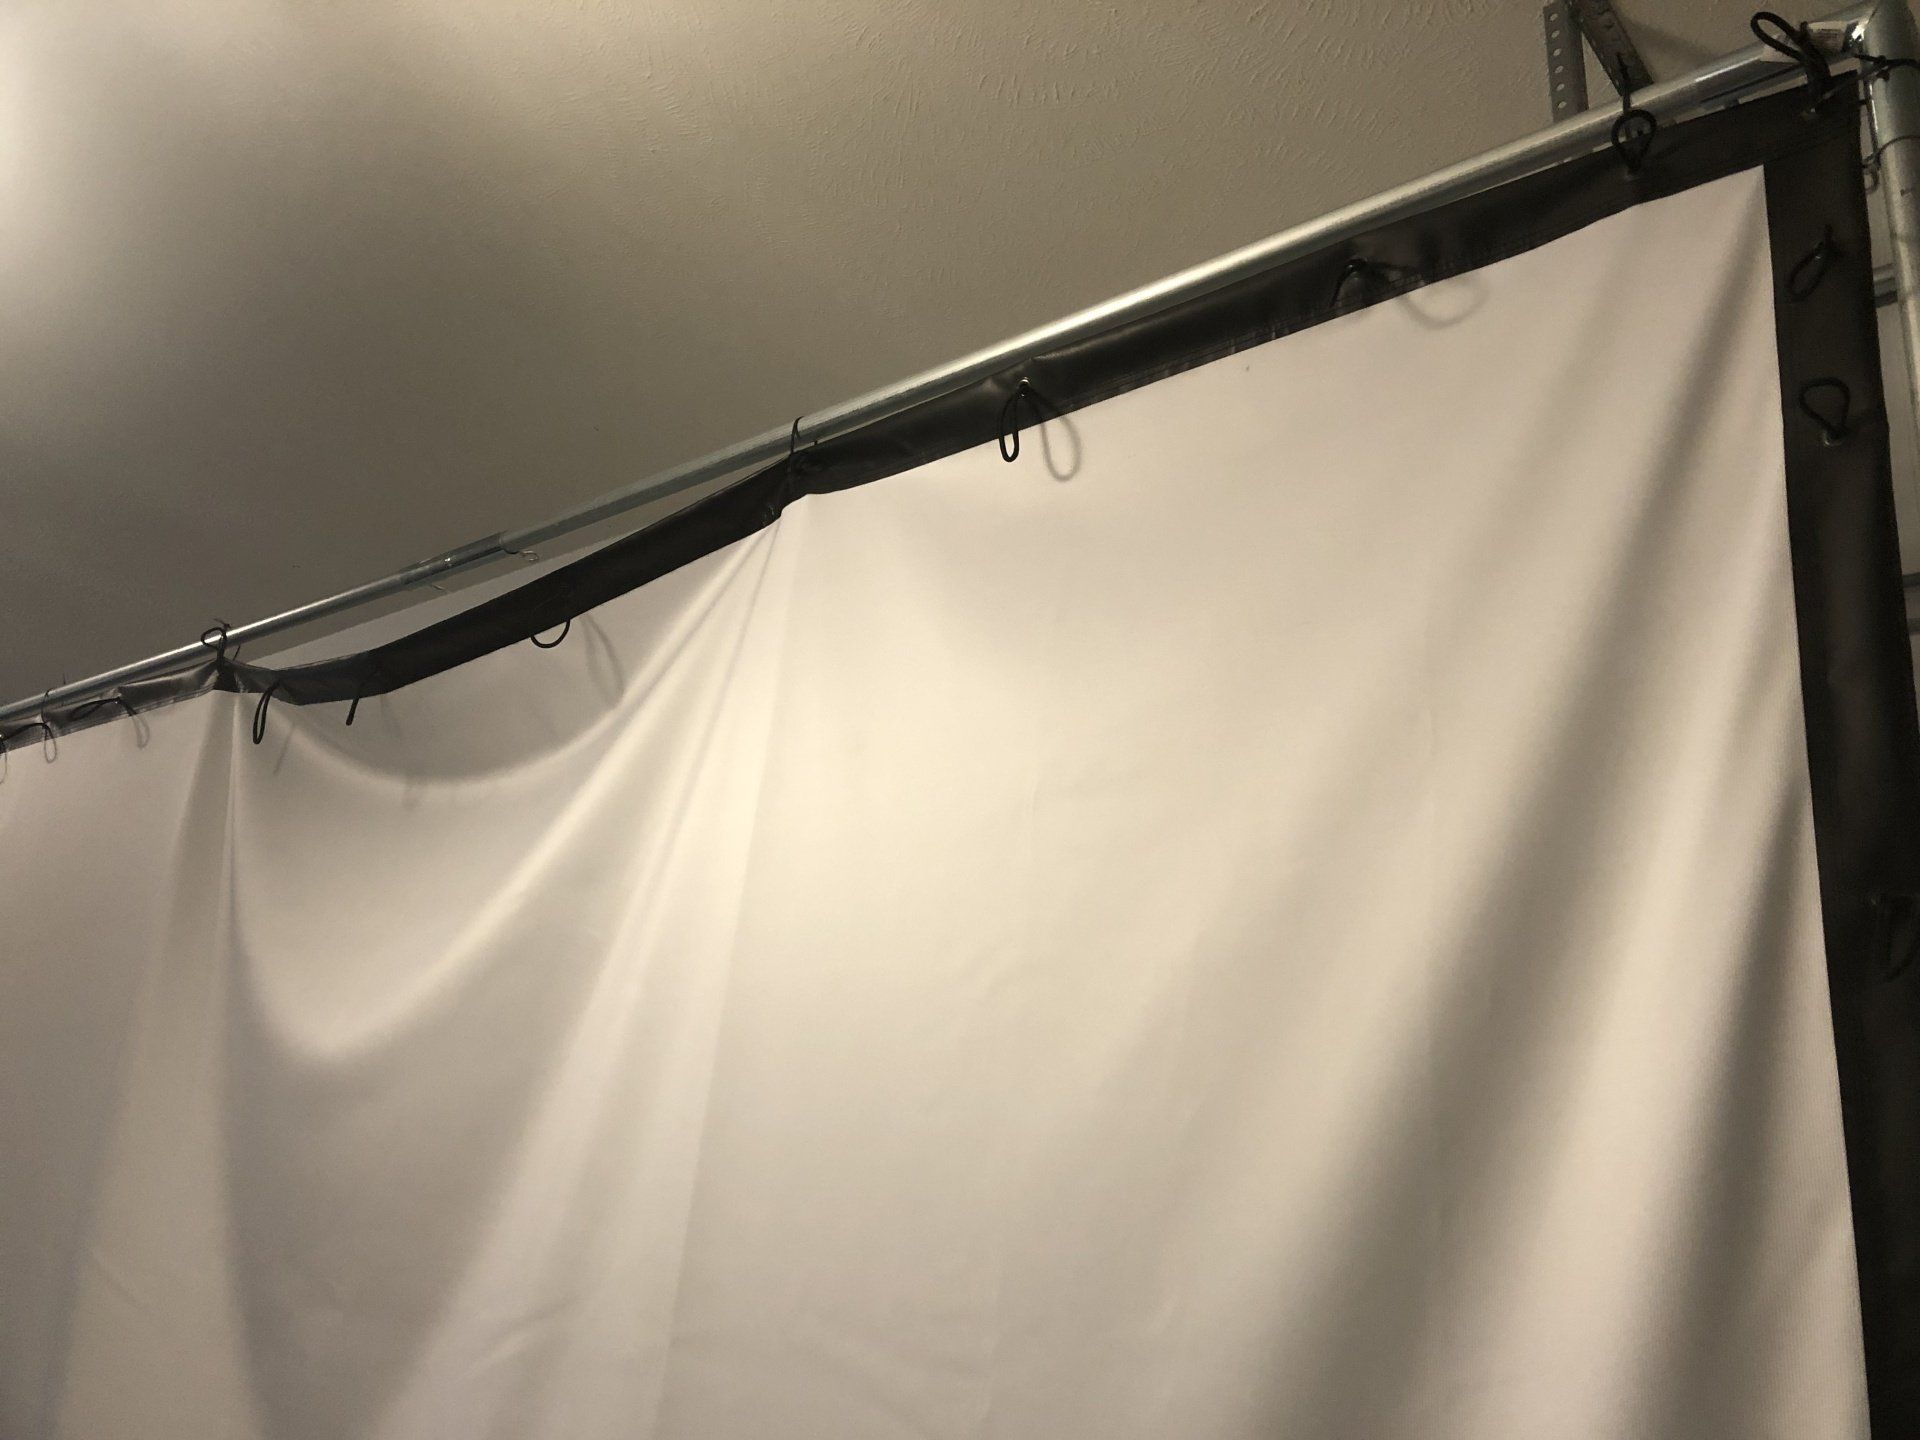
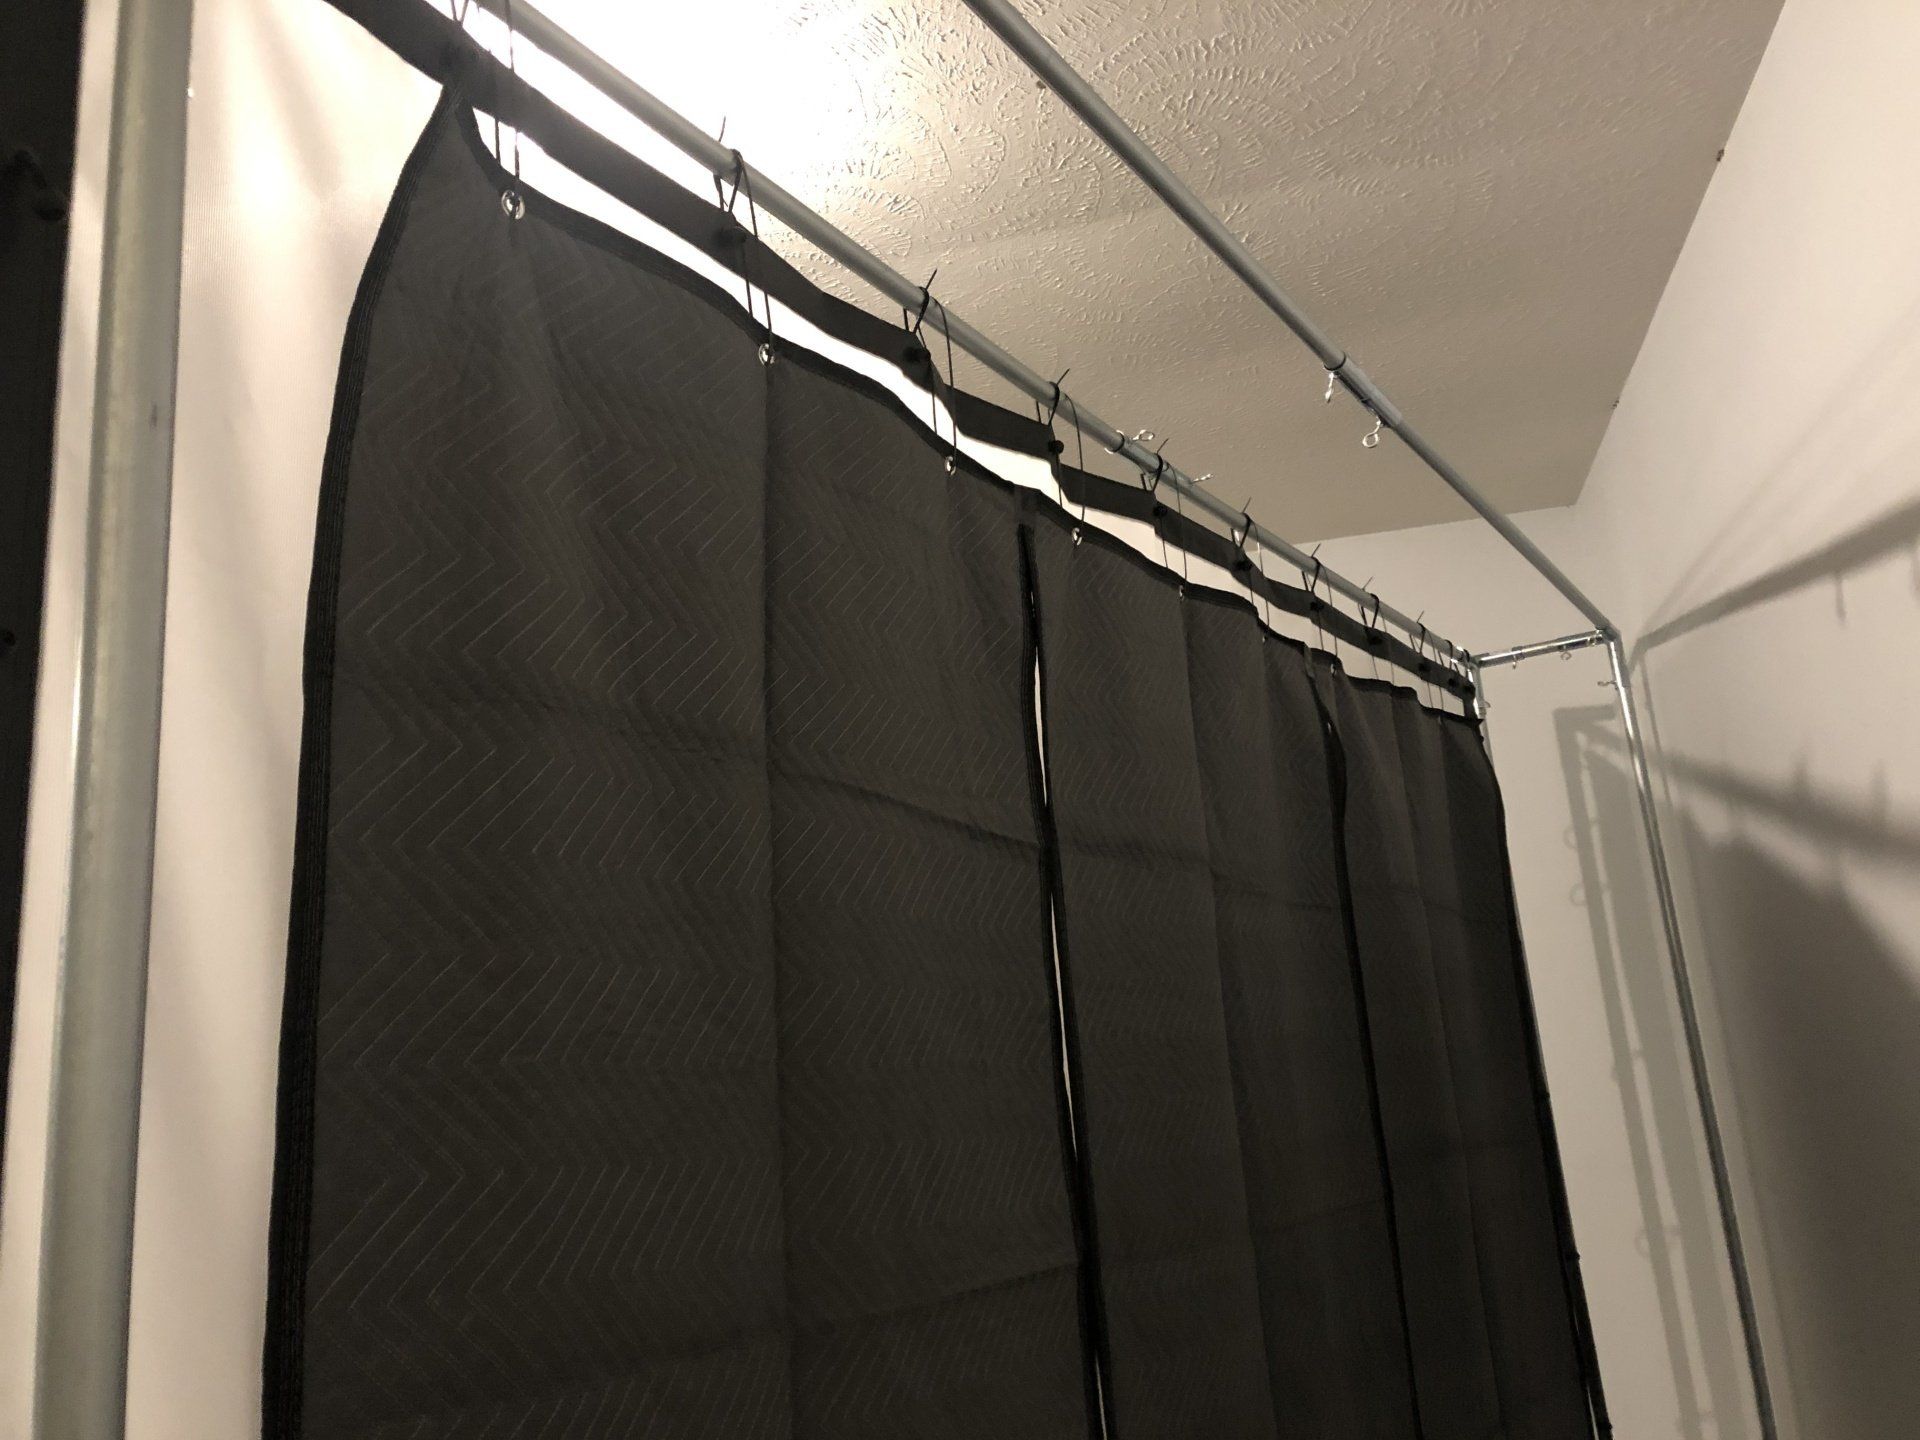
- Don't use bungee cords. They create extra spring that shoots the ball back at you. Suspend the screen with zip ties or rope.
- Don't use moving blankets. You need more weight behind the ball. I went to Menards and purchased large 8oz. canvas drop cloths.
- Don't try and build the enclosure... see below.
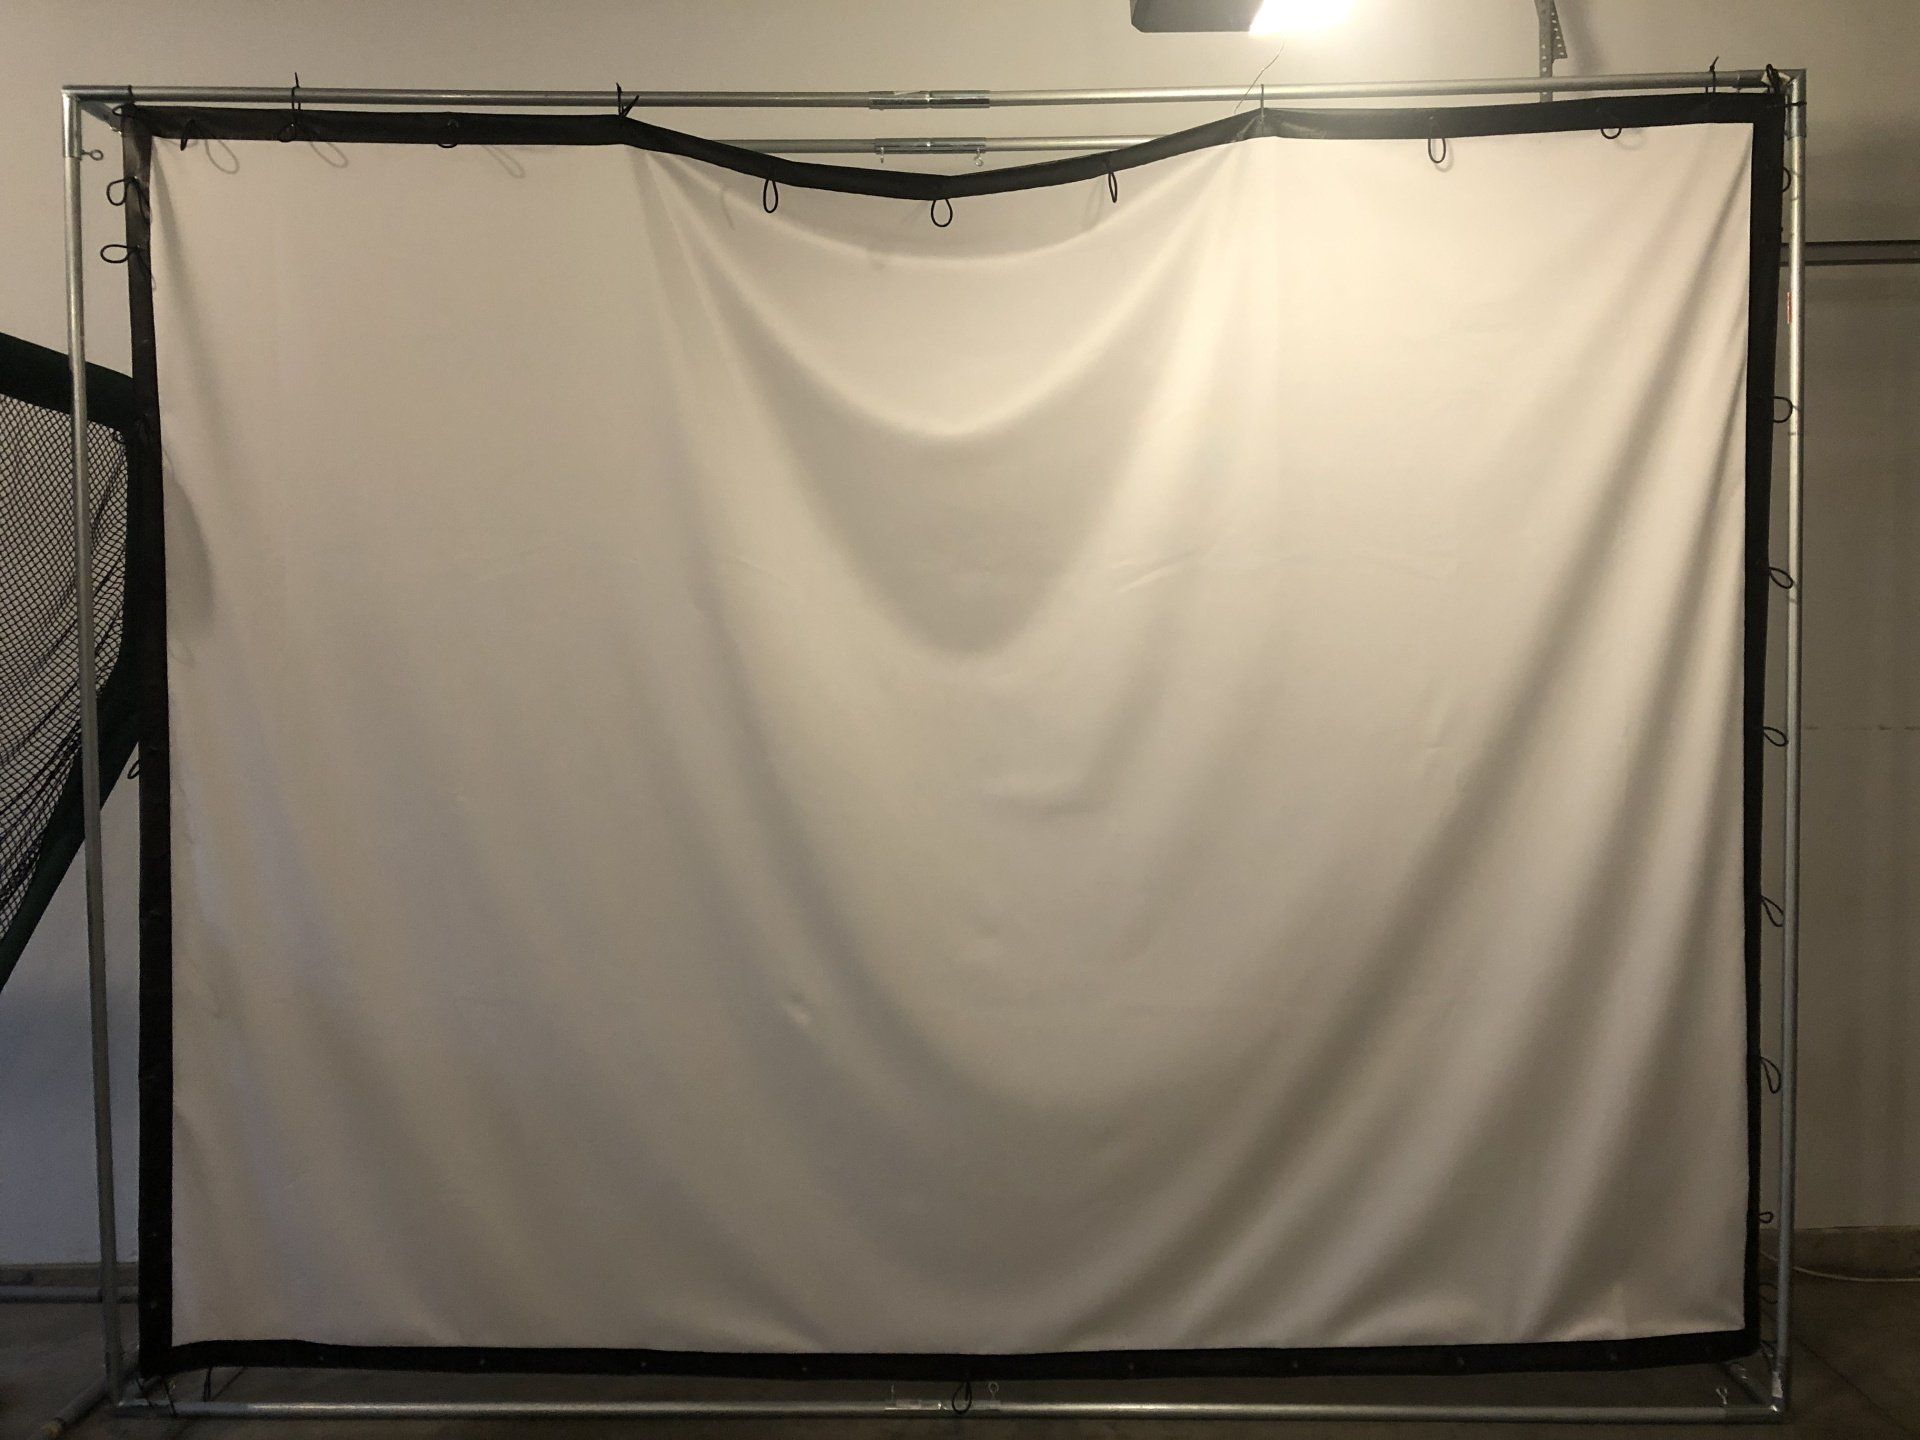
The more I continued to put together this article, the more I would advise you to purchase an enclosure. I constructed mine to be low-profile up against the wall to take up less space in my garage. However, I now have a net to right, and netting above, which explains why Carl's Golf enclosure comes 5ft towards you.
The reality is, you or one of your buddies is going to shank a shot right. Secondly, I don't know if its my construction, and I've tinkered with the configuration dozens of times, a full swing with a wedge shoots up off the screen. Without the added netting above, the ball hits the ceiling or comes back at you.
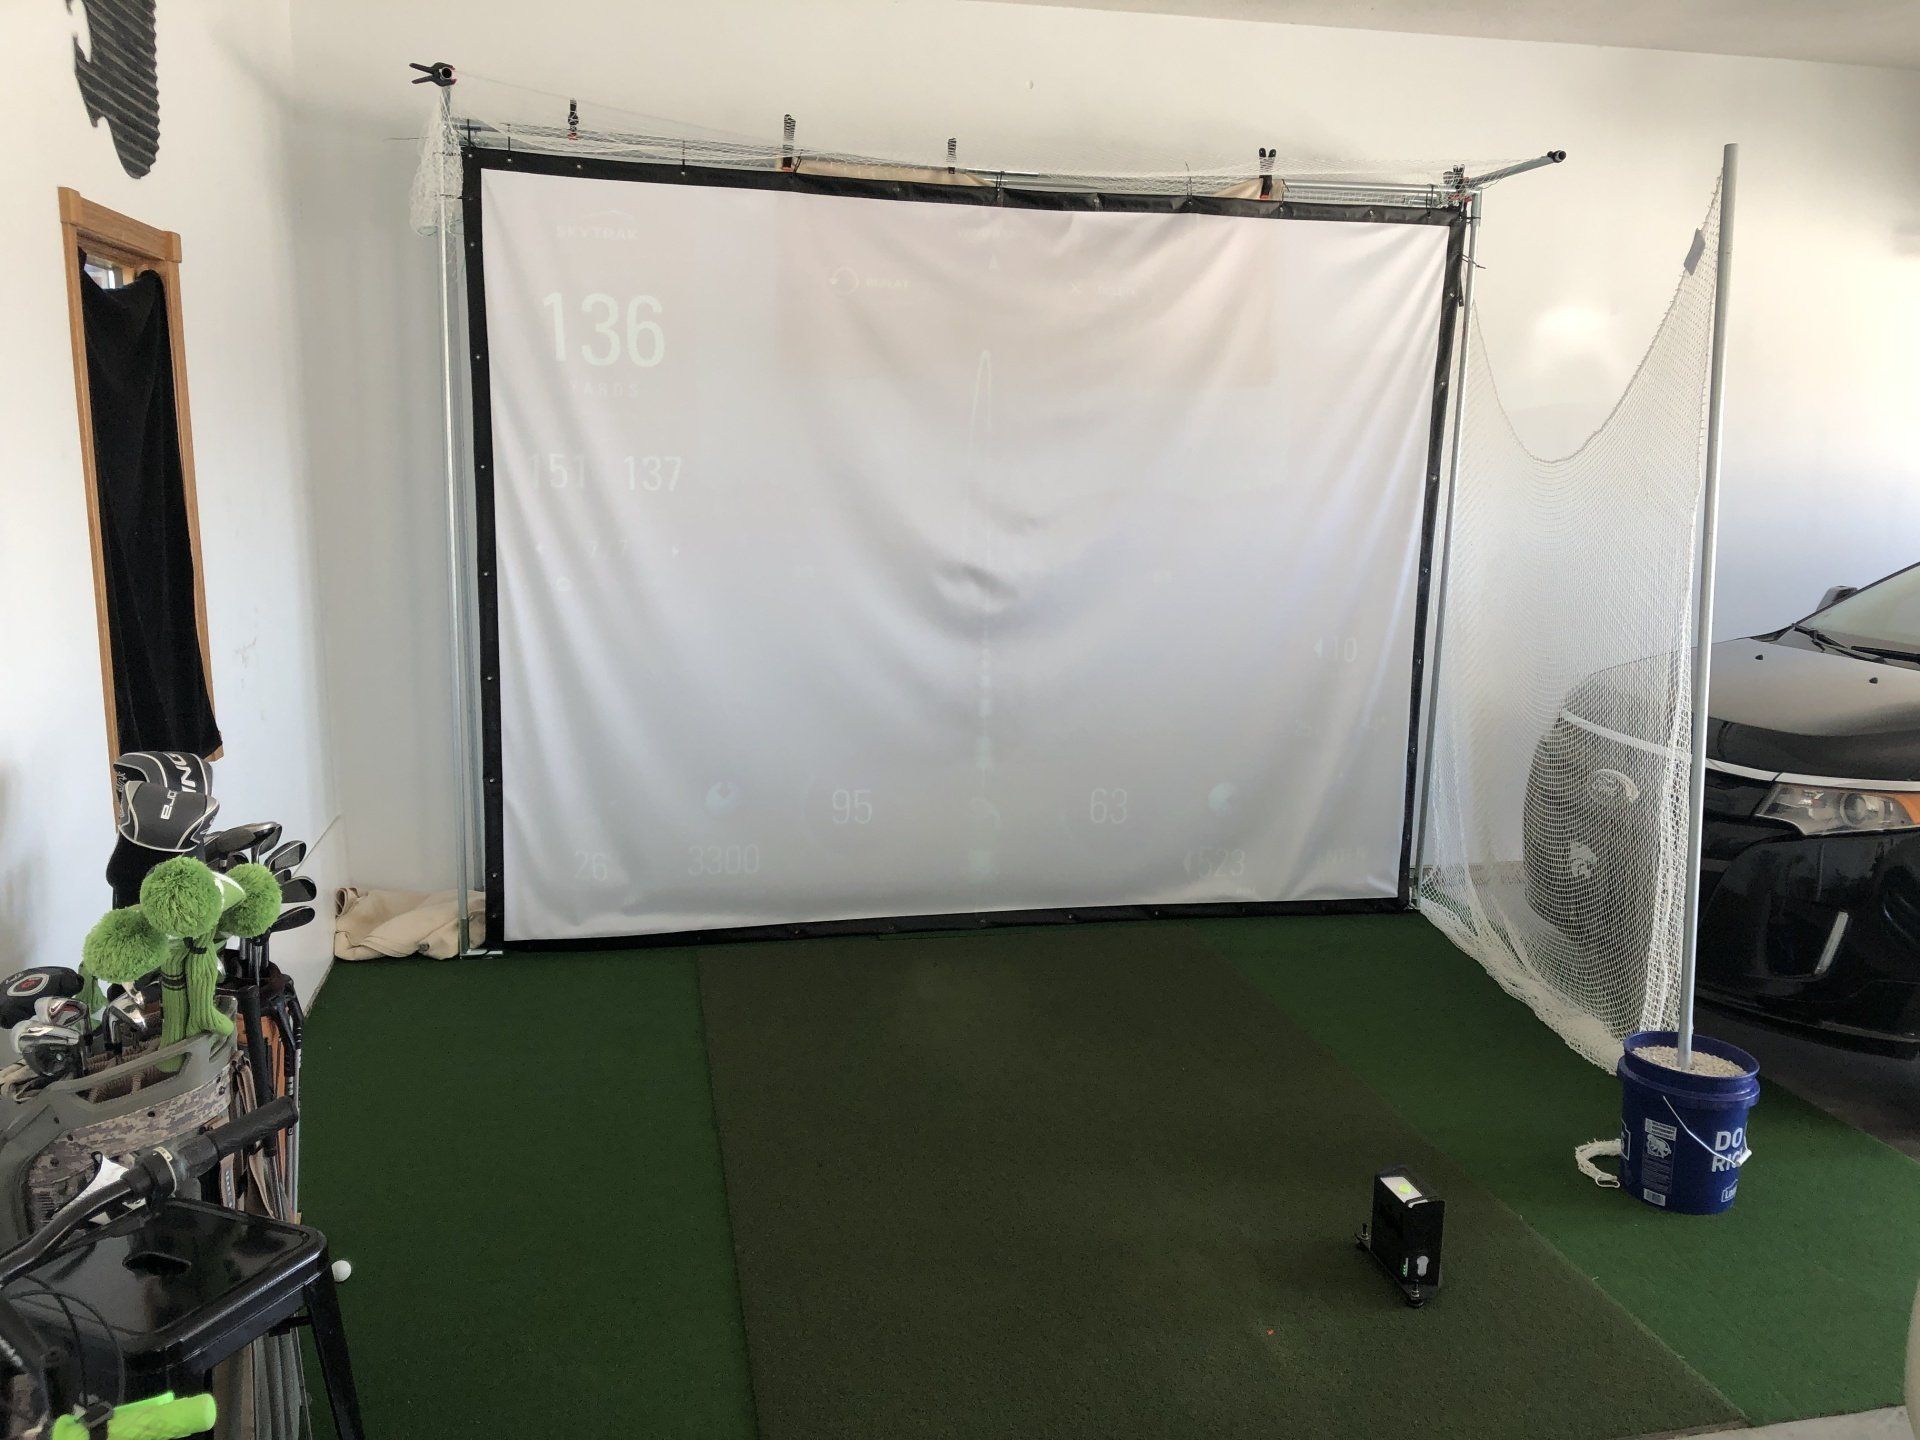
I have a iPad I connect to the SkyTrak through Wifi, and an Apple TV mounted on my projector, which is mounted to the ceiling. I use Airplay to feed the iPad image to the projector. You don't have to have Wifi to connect your iPad to your SkyTrak, but you will need Wifi to get the iPad to the Apple TV. I have a mesh Wifi network and had to add a node to extend my reach to the other end of the garage. I did set it up with an older iPad, and it lagged bigtime. Quick way to get a buzz as I had time to take a drink after I hit, and waited for it to show on the screen.
Setup:
- SkyTrak
- Optoma GT1080Darbee Short Throw Projector - 3000 Lumens
- Apple TV (3rd Generation)
- iPad Air 2 (running 13.3 software)
- Pro Turf 6x10 hitting mat
- Carl's Place Preferred Impact Screen (8.5ft x 11ft)
- And a bunch of misc. items
Conclusion:
My buddy has a Carl's Place screen, and he doesn't have the bounce back I get. His screen is smaller and the setup is different. If I had it to do over again, I would purchase the Golf Simulator Enclosure Kit from Carl’s Place
(8.5 x 10 x 5). I can't recommend it as I have never assembled or used one. I may, and I mean may, have saved some money with the DIY enclosure. However, the time to construct it and tinker with the setup has been the biggest negative.
I have my setup in a good place now. Full gap and sand wedges are still a little dicey. I probably would pony up a little more money for more lumens on the projector. Short throw is a must on the projector... and don't go cheap. I tried a noname projector
from Amazon that boasted 6500 lumens and had to return it. With garage doors open in the middle of the day, it's a challenge to see the screen.
Be interested to hear about other people's home golf simulators. The reason I wrote this article is because I couldn't find one when I was researching it. I'm not a writer, this was not intended to be a masterpiece of writing. This is a diary of what I learned, and hopefully someone else finds this helpful.
--- UPDATED MARCH 2020 ---
Since this article was published, the screen has broken in quite nicely, and shots are not deflecting back or up into the ceiling. I lowered the screen from where I started, so the bottom just barely rests on the ground. This DIY setup is working great right now, and I'm happy I stuck with it. The slim profile of this screen system takes up minimal space in my garage compared to pre-built systems.

The current wedges I carry in my bag are old Top Flite Tour Wedges (50° & 54°). I've gone through several expensive Cleveland wedges and a Callaway Mack Daddy MD3 milled wedge . Somehow, the Top Flite wedges always find their way back into the bag.

Comparison between three devices used by golfers to enhance their game - the Zepp 2.0, Voice Caddie, and Skytrak